
Trace the impact beyond the bumper
Rear End Collision Repair Dubai
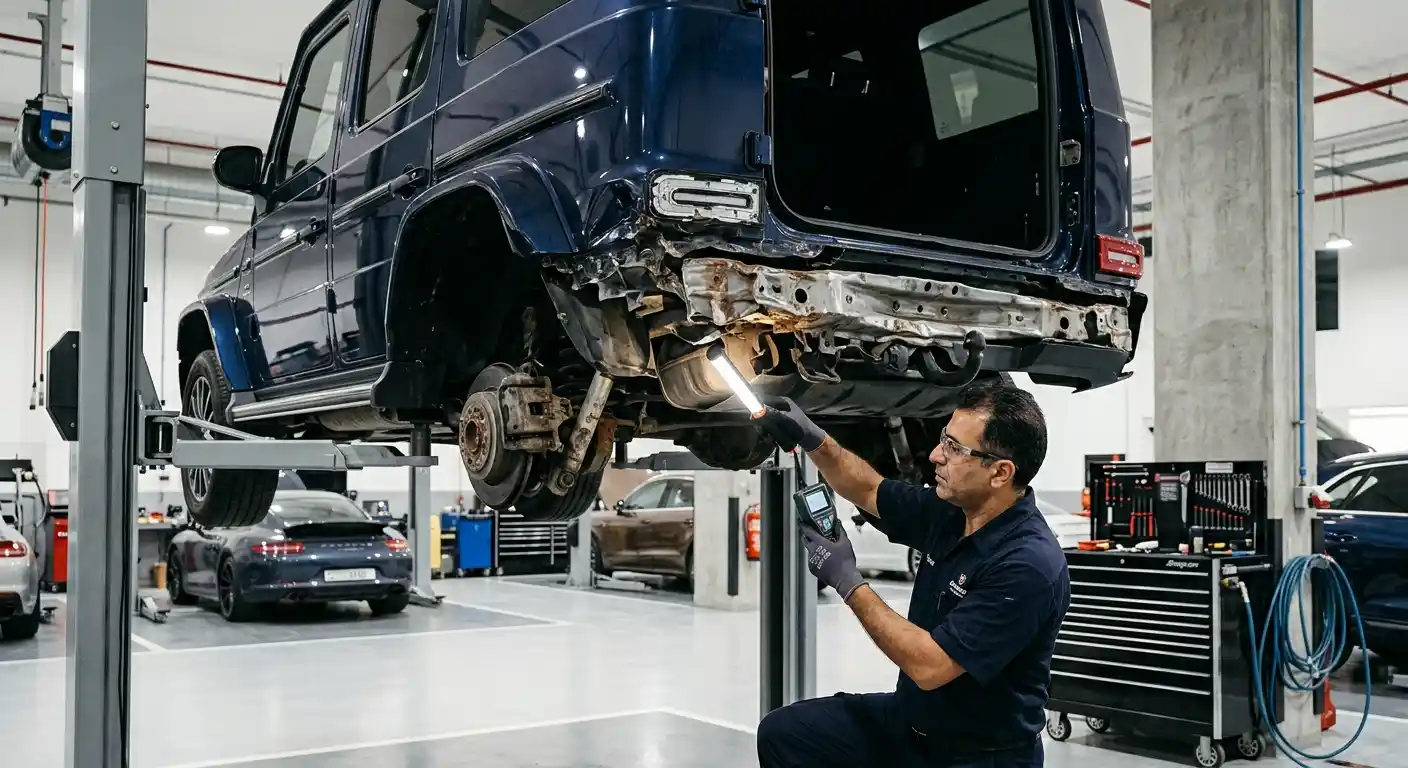
A rear bumper can spring back after impact while retainers, reinforcement, the boot floor or nearby panel relationships remain changed. Our assessment follows the impact path before the repair scope is agreed.
Bring the vehicle to our Al Quoz 4 workshop or send clear photographs to start. We explain what is visible, what may need controlled access and which costs can only be confirmed after inspection.
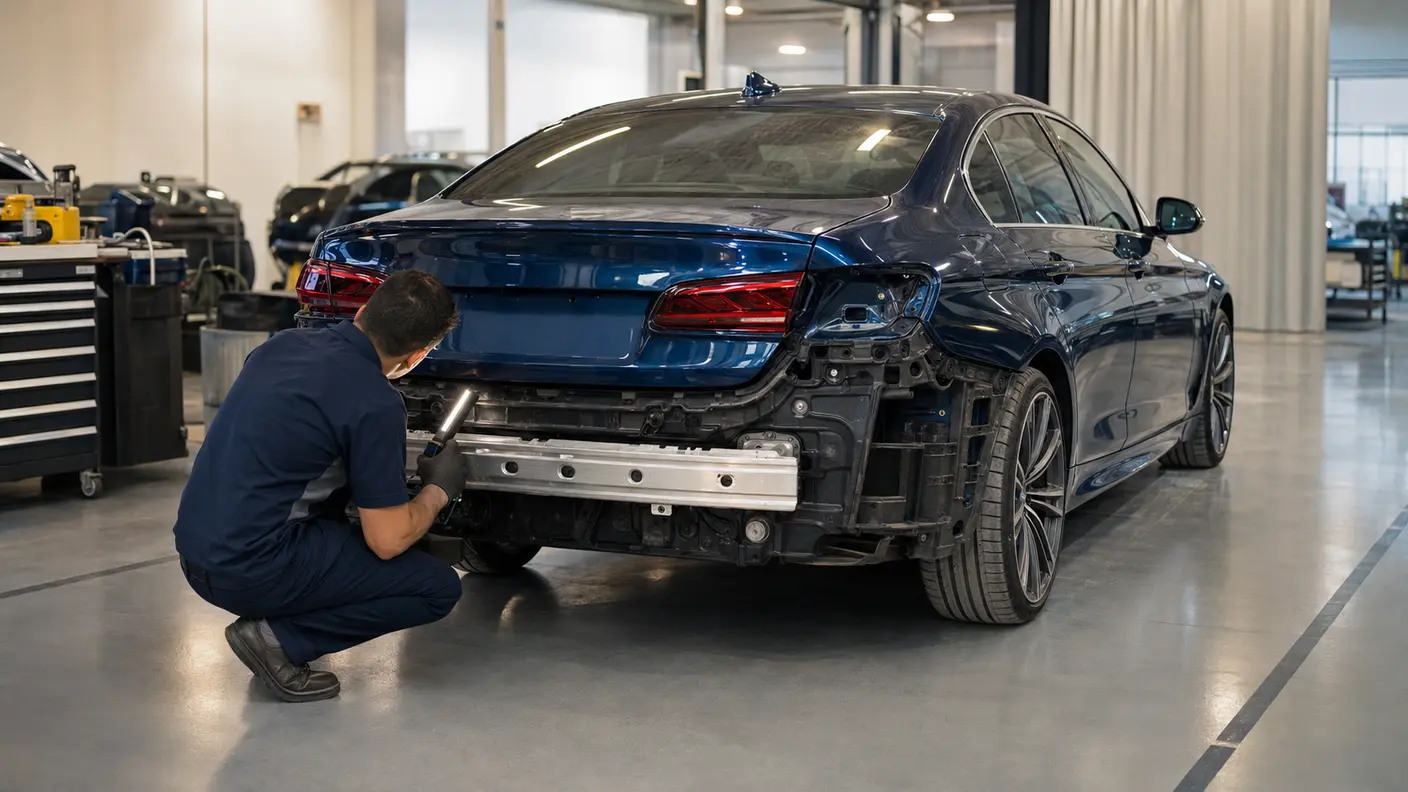
Begin with the force path
The most obvious mark is not always the full repair
A low-speed tap may leave scuffs, a shallow dent or a bumper corner that no longer sits flush. A stronger impact can carry movement through side retainers, the reinforcement area, rear body panels and the luggage-floor region. The boot lid or tailgate may then close differently, a lamp edge may sit proud, or the gap between the bumper and quarter panel may change.
That does not mean every rear impact has serious hidden damage. It means the vehicle should be assessed in the right sequence. We first record the visible condition and operating concerns. Where justified, the scope can then include controlled removal of trim or the bumper cover so the concealed area can be seen. Our broader accident repair service follows the same principle: diagnose the impact before locking the estimate.
Useful starting photographs include a full rear view, both rear corners, the side gap between bumper and quarter panel, the boot opening, the spare-wheel well if it is accessible, and any warning displayed inside the vehicle. Tell us whether the boot closes normally, whether water appeared after rain or washing, and whether a new rattle, vibration or exhaust noise began after the collision.
Rear impact map
Seven connected zones guide the inspection
The sequence moves from the outer cover towards the areas that receive, locate or reveal rear impact energy. Findings at one point determine whether the next point needs attention.
Bumper cover
Scuffs, tears, shape and paint condition
Guides
Side retainers, clips and mounting edges
Reinforcement
Visible deformation and attachment condition
Boot floor
Spare-wheel well, seams and surface changes
Opening
Boot lid, latch feel, seals and gap pattern
Outer panels
Lamps, quarters and bumper junctions
Lower rear
Exhaust, covers and suspension-adjacent signs
Visible versus concealed
What can sit behind a bumper that looks almost normal?
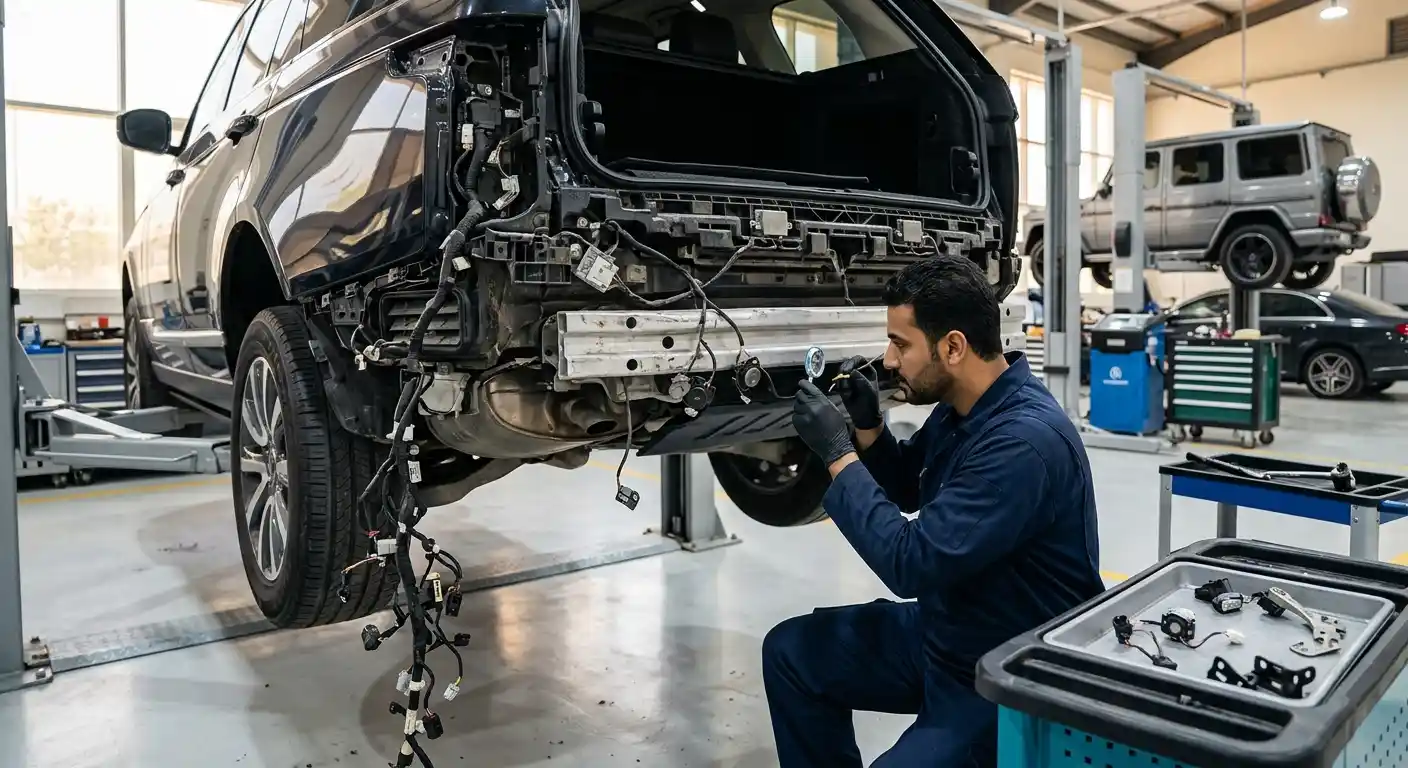
Modern bumper covers are flexible outer parts. They may recover much of their original shape after contact, so the surface can understate what happened behind it. Side guides can crack, mounting tabs can tear, absorber material can compress and the reinforcement area can show a change that cannot be judged through the painted cover.
Hidden access is not automatic. It should be justified by impact severity, displaced fit, warning signs or the need to prepare a dependable estimate. Once access is authorised, photographs and notes can distinguish collision damage from age, corrosion, missing clips or earlier work.
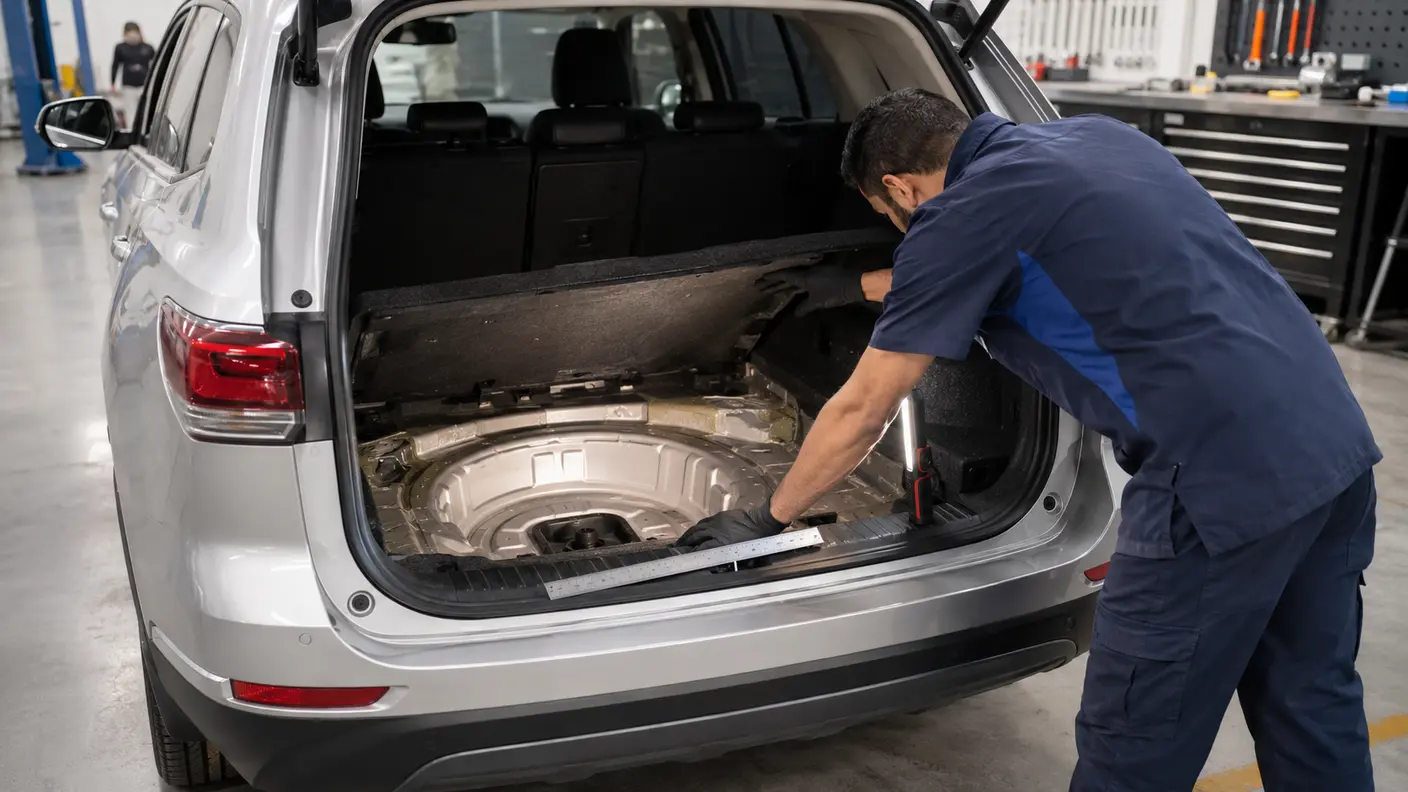
Boot floor and spare-wheel well
We look for fresh creases, disturbed seams, displaced trim, moisture paths and changes around the luggage-floor shape. Carpet and trays can hide small clues. A flat visual check from above is not always enough.
Boot lid, tailgate and latch
Closure effort, latch position, seal contact and left-to-right gaps help show whether the opening still relates correctly. Adjustment alone is not a substitute for understanding why the gap changed.
Lamps and quarter panels
A lamp may work while its tabs or surrounding fit have moved. Quarter-panel reflections, arch shape and the bumper junction are reviewed together because their lines visually depend on one another.
Exhaust and lower covers
A shifted tip, new rattle, damaged hanger or displaced underbody cover can follow low rear contact. Heat shields and visible lower fixings are checked when the impact location makes them relevant.
Rear wheel area
A direct corner impact near a wheel deserves a wider review if the vehicle develops steering pull, unusual tyre clearance, vibration or a change in stance. These symptoms should not be treated as paint-only concerns.
Previous repair layers
Old filler, refinishing, replaced clips or earlier alignment work can change the new method. The estimate should identify newly discovered prior work rather than silently building assumptions around it.
Rear rails and rear body structure
A stronger rear impact can transfer load beyond the bumper reinforcement into rear rails, the rear body panel or adjoining floor structure. Changed dimensions, fresh folds, disturbed seams or persistent opening misalignment should be measured and assessed before the repair is treated as a bumper-only job.
Reverse camera, parking sensors and rear ADAS
Rear cameras, parking sensors, blind-spot radar or hands-free tailgate equipment may sit in the bumper, lamps or surrounding trim depending on the vehicle. Their presence should be recorded before removal, and any warning, mounting change or manufacturer-required calibration should remain a separate verification item after repair.
Drive or arrange recovery?
Use the symptoms, not just the appearance
A car that moves under its own power is not automatically suitable to drive. Stop and seek appropriate assistance if a lamp is broken or insecure, the boot will not latch, a panel or liner is contacting a tyre, fluid is leaking, the exhaust is loose, a strong fuel smell is present, warnings remain on, or the vehicle steers, vibrates or sounds materially different.
If the damage appears limited, photographs can help us discuss the next step, but they cannot establish roadworthiness. The driver remains responsible for deciding whether the vehicle can be used safely and legally. When uncertain, arranging recovery is the cautious option.
Do not rely on tape for an insecure closure
A boot lid, tailgate, lamp or bumper part that cannot be secured correctly can move during travel. Temporary cosmetic measures should not replace a proper decision about whether the car should be transported.
Repair or replace
The decision is made component by component
One rear collision can involve a repairable bumper cover, a broken guide that needs replacement and a metal panel that requires a separate judgement. A single label rarely describes the complete job.
Repair may be considered when
- The bumper cover has repairable scuffs, local deformation or a suitable plastic damage area.
- Metal distortion can be corrected without leaving unacceptable stretch, weakness or surface instability.
- Mounting edges and adjacent parts can locate correctly after the proposed work.
- Previous paint and filler do not make the method unreliable.
- The repair route controls the intervention while still supporting fit and finish.
Replacement may deserve consideration when
- A cover is extensively torn, badly distorted or damaged at important mounting areas.
- Tabs, brackets, lamps or retainers cannot be dependably restored.
- A panel has severe folds, tearing, excessive stretch or difficult edge damage.
- Earlier repair layers materially restrict a new repair.
- Labour, refinishing area and uncertainty make replacement more reasonable.
Our car body repair service explains how panel material, access, severity and surrounding fit influence the method. For damage centred on the outer cover, our rear bumper repair service explains the separate decisions for cracks, dents and paint damage. Final decisions remain specific to the vehicle, model year, component and findings.
Staged repair plan
A clear sequence reduces guesswork
The scope should mature as evidence becomes available. That protects the owner from a vague open-ended job and protects the repair from being forced into an estimate based only on the outer scuff.
Record the arrival condition
We note impact location, paint marks, panel gaps, closures, warnings and relevant symptoms. Existing unrelated damage is separated where possible.
Plan controlled access
If justified and authorised, trim or the bumper cover is removed in a sequence that protects reusable pieces and exposes hidden mounting areas.
Confirm the method
Repair, replacement, parts, preparation, refinishing and reassembly are set out. Any unknown price or insurer decision is labelled clearly.
Trial fit before finish
Relevant parts and gaps are checked before final paint where practical, reducing the risk of discovering a fit conflict after refinishing.
Prepare and refinish
Substrate condition, corrosion protection where disturbed, colour planning, texture and blend boundaries are addressed for the agreed panels.
Reassemble carefully
Retainers, seals, trims, liners, lamps and closures included in the scope are refitted and visually checked for correct seating.
Function checks
Relevant lamps, boot operation and items affected by dismantling are checked. Any unresolved warning or separate specialist need is documented.
Review at handover
The completed vehicle is compared with the agreed scope under useful light, with aftercare and outstanding exclusions explained.
Rear paint and panel relationships
Colour is only one part of the visual repair
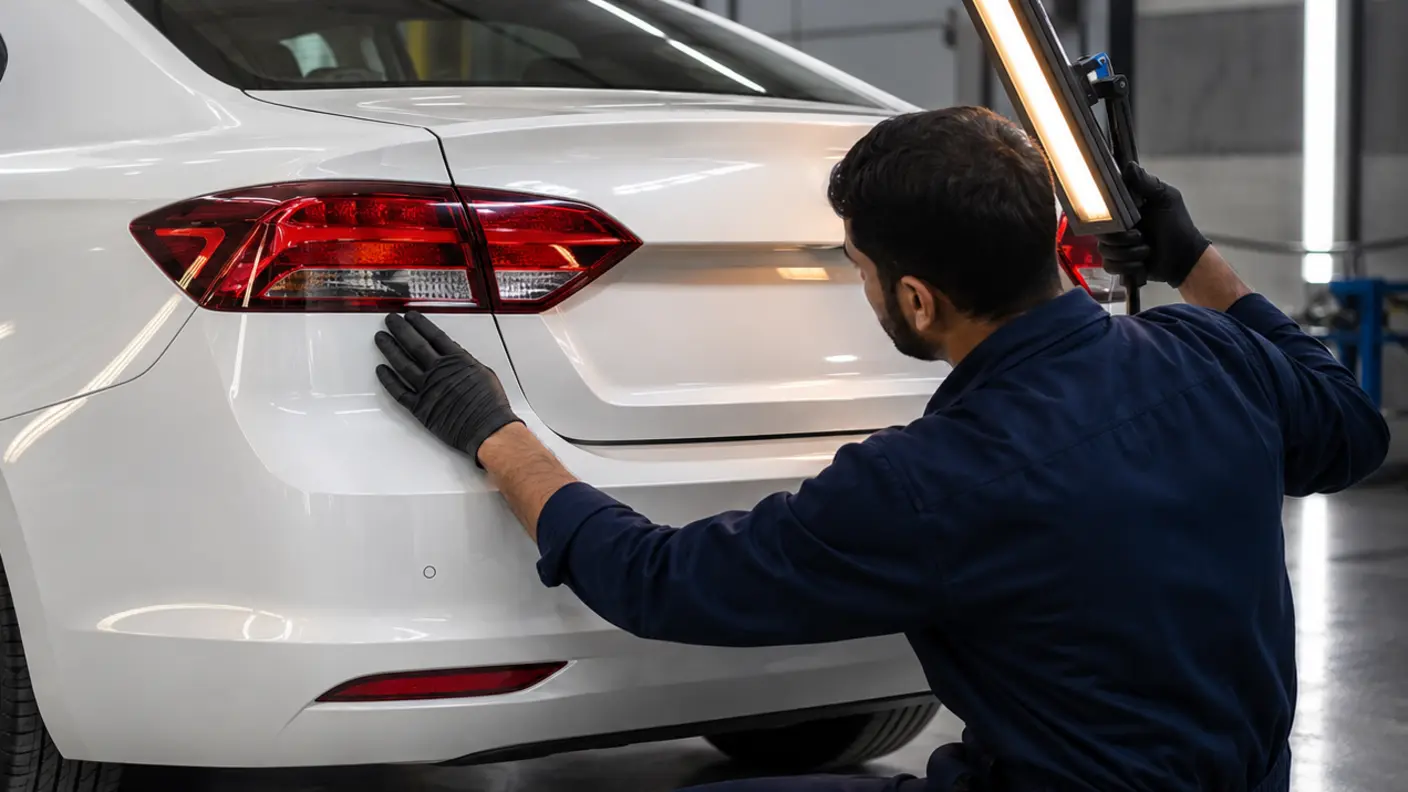
Rear bodywork combines different viewing angles in a compact area. The bumper cover, quarter panel, boot lid and lamp edges can all reflect light differently. Plastic and metal substrates may also make the same paint formula appear slightly different. The paint plan therefore considers the existing finish, repair location, colour behaviour and the boundary where new work meets the original surface.
For metallic or pearl finishes, spray-out checks and controlled viewing can support the colour decision. Blending is not automatic. It is considered when it creates a less visible transition than a direct edge would. Texture, gloss and surface shape still need attention because a close colour can look wrong if the orange peel or panel reflection differs.
Panel fit should be assessed before final refinishing wherever practical. A lamp edge, boot gap or bumper corner that needs further adjustment can create avoidable rework if discovered after paint. Read more about surface preparation and colour planning on our car painting service.
Indicative Dubai repair costs
Cost rises with damage depth, access and parts
These bands are planning guides, not quotations. Model, part price, material, paint system, previous work and concealed findings can materially change the final scope.
Transfer removal or light polishing
Suitable only when inspection shows that the concern is on the surface and deeper paint layers are not damaged.
Plastic repair and paint
Local bumper repair may include controlled plastic work, preparation and refinishing. A full bumper repaint can be AED 600 to AED 1,500. See the bumper repair cost Dubai guide for a wider repair-versus-replacement comparison.
Dent repair with refinishing
A larger dent with paintwork is often AED 700 to AED 1,200 or more. Panel painting starts from about AED 450 before added repair or blending scope.
Bumper replacement
The range can widen because the cover, guides, trims, lamps, absorber pieces and current parts availability vary substantially by vehicle.
Boot floor or broader rear body findings
Dismantling, measuring, metal work, corrosion protection, parts and refinishing must be defined after inspection. Confirmed broader body work may exceed simpler bumper bands.
What a useful estimate should show: repair and replacement lines, labour or dismantling assumptions, paint panels, blend panels if proposed, reusable parts, current-price parts, tax treatment and any provisional item that depends on access. Insurance approval and policy coverage remain separate from the physical repair requirement.
Insurance and supplementary findings
The estimate may change when authorised access reveals more
An insurer or surveyor may first see photographs of the assembled vehicle. If the outer bumper hides damage that becomes visible only after approved dismantling, the workshop can document the finding and prepare a supplementary estimate. Extra work should not simply appear without an explanation of what changed.
Keep the police report or relevant incident record, claim number, accident photographs, insurer communication and details of new symptoms. Ask the insurer which repair route is permitted by the policy, whether an excess applies, which parts basis is approved, and how pre-existing damage will be treated. The insurer decides coverage. The repair assessment explains the vehicle findings.
Before dismantling
Record the assembled gaps, scuffs, broken parts, warnings and owner-reported symptoms.
After access
Photograph newly visible damage and identify which estimate line must change.
Before added work
Confirm the revised scope, price basis and any approval that remains outstanding.
Parts and timing
A realistic completion date depends on three gates
A bumper scuff and a rear body repair should not be given the same timetable. The schedule becomes more dependable after the repair route and parts position are known.
Scope gate
Inspection and controlled access determine whether the job remains a cover repair or expands to retainers, lamps, panels, floor work or other components.
Parts gate
Availability, correct variant, condition and delivery timing affect the plan. Paint should not rush ahead of a fit question that depends on an unconfirmed part.
Approval gate
For insurance work, supplements may wait for review. For customer-paid work, a revised estimate should be accepted before unexpected extra work proceeds.
The working period can also include repair, preparation, paint curing, reassembly and final checks. Ask for milestones rather than a promise made before the bumper has been inspected. If a delay develops, the useful update is the specific gate holding the job and the next confirmed action.
Rear repair handover
Inspect the whole rear relationship at collection
Take a few minutes with the advisor and compare the finished vehicle with the agreed estimate. A rear repair should be reviewed in daylight or strong neutral light where possible.
- View the repaired surface from the rear and both rear-quarter angles.
- Compare bumper-to-quarter gaps on the left and right.
- Check lamp seating, reflector fit and trim alignment.
- Open and close the boot lid or tailgate several times.
- Look at the seal contact and luggage-area trim seating.
- Follow reflections across the quarter, boot lid and bumper.
- Check colour and texture in more than one viewing angle.
- Confirm relevant lamps and functions affected by the repair.
- Ask which parts were repaired, replaced or reused.
- Review any separate pre-existing damage or exclusions.
- Request paint aftercare guidance for washing or polishing.
- Keep the final estimate and insurer supplement with your records.
Fresh paint aftercare depends on the materials, curing process and any protection you intend to apply. Ask for advice specific to the completed job rather than relying on a universal waiting period.
Frequently asked questions
Rear end collision repair questions in Dubai
Can a rear bumper look normal but still have damage behind it?
Yes. A flexible outer cover may recover its shape while retainers, mounting tabs, absorber material or the reinforcement area remain changed. Inspection findings determine whether controlled removal is justified.
What are common signs of hidden rear impact damage?
Possible signs include changed bumper gaps, difficult boot closure, a lamp sitting differently, a new warning, water entry, rattling, exhaust noise, vibration or fresh changes in the spare-wheel well. These signs require assessment and do not prove the same damage on every vehicle.
Is it safe to drive after being rear-ended?
That cannot be decided from appearance alone. Do not drive if a panel or lamp is insecure, the boot will not latch, a tyre is contacted, fluid leaks, the exhaust is loose, warnings remain on, or the vehicle steers, vibrates or smells unusual. Arrange appropriate assistance when uncertain.
Can you estimate rear collision repair from photos?
Photos can support a preliminary discussion and help plan an inspection. They may not reveal broken retainers, compressed parts, boot-floor changes, previous repairs or damage behind trim, so a final quote may require in-person inspection and authorised access.
Can a cracked rear bumper be repaired?
Sometimes. Crack location, plastic type, distortion, mounting damage, previous repair and surrounding fit influence the choice. Extensive tears or damage at important mounting areas can make replacement more reasonable.
Why is my boot lid difficult to close after a rear impact?
The lid, latch, hinges, opening or surrounding panel relationships may have changed. It should be inspected before repeated force or simple adjustment is used, because the cause needs to be understood first.
How much does rear end collision repair cost in Dubai?
Light polishing may start near AED 150. Plastic repair and paint may be AED 500 to AED 1,200, a full bumper repaint may be AED 600 to AED 1,500, and bumper replacement may be AED 1,200 to AED 6,000 or more. Hidden damage, parts and paint scope can change the total after inspection.
Will insurance pay for hidden damage found after dismantling?
Coverage depends on the policy and insurer approval. The workshop can document newly visible collision damage and prepare a supplementary estimate, but the insurer decides whether that added scope is covered.
How long does rear collision repair take?
Timing depends on the confirmed damage, repair method, parts availability, paint process, reassembly and any insurance approval. A more dependable schedule can be given after the scope and parts position are known.
Does the rear quarter panel always need replacement?
No. The decision depends on material, severity, access, edge condition, stretch, previous work and the expected result. Some damage may be repairable, while severe folds, tearing or difficult mounting-area damage may support replacement.
Why might adjacent paint blending be proposed?
Blending may support a less visible colour transition on certain metallic or pearl finishes. It is not automatic and depends on colour behaviour, repair location, panel orientation and the existing finish.
What should I check when collecting the repaired car?
Check the bumper and quarter gaps, lamp seating, boot operation, seals, luggage trim, colour, texture and reflections. Confirm relevant functions, ask what was repaired or replaced, and review aftercare and any exclusions.
Start with evidence, not assumptions
Show us the rear damage and what changed after impact
Send wide and close photographs or arrange an inspection in Al Quoz 4. We will explain the visible scope, any justified access and the cost items that still need confirmation.
Repair options and pricing depend on inspection, vehicle condition, component requirements, parts availability and the agreed scope. Cost ranges are indicative planning bands.