
You’ve got a dent. Maybe it’s just a scratch. But in Dubai, where style matters, even a tiny blemish on your car can feel like someone scuffed your confidence. That “factory-fresh” look it’s not just cosmetic. It’s pride. It’s personal. So you ask, “How do I get that back?” The answer? Aluminum welding car repair done right. Aluminum needs precision: it oxidizes fast, reacts to heat, and if mishandled, your fix looks worse than the damage. And after welding comes the real magic: paint adhesion, perfect color matching, automotive paint layering, and that deep, high-gloss finish that turns heads again.
Because you’re not just repairing a car, you’re reclaiming how it makes you feel.
Why Aluminum Welding Car Repair Isn’t Just Another Fix?
Aluminum’s been part of car design for decades, especially in models chasing efficiency without sacrificing strength. Audi made waves with it, Ford followed, and now it shows up across luxury SUVs and pickup trucks. But aluminum is not forgiving. It oxidizes seconds after exposure, hates excess heat, and reacts poorly to lazy prep. Welding it requires finesse, heat control, and tools that don’t belong in a basic steel repair kit. Without a proper spray booth setup, the layers of paint may never bond right, and automotive paint layering becomes more luck than science.
I once watched a technician in Dubai work on a dented matte-black Jaguar. Rear quarter panel aluminum. The owner said, “I don’t want it fixed. I want it invisible.” He meant it. Every inch had to be stripped, cleaned, welded, sanded, and sprayed with basecoat and clearcoat, all timed under curing lamps. Hours of prep, all to make it look untouched. When it rolled out of the booth, even the owner paused. That’s aluminum welding car repair done right, not patchwork, but precision work that restores pride, not just panels.

Tools of the Trade | Choosing the Right Welding Tools for Precision Repair
When it comes to aluminum welding car repair, success isn’t just about skill; it’s about setup. Using the wrong tool or ignoring prep? That’s how you end up with warped panels, weak welds, or paint flaking off after the first wash. Dubai’s climate adds its challenges too, with heat and humidity affecting everything from metal temperature to ventilation requirements. Here’s what every technician needs in their corner:
MIG vs TIG Welding in Car Repair
(aka: the gloves-off showdown in the garage)
- MIG (Metal Inert Gas) welding is faster and more beginner-friendly. Ideal for body shops doing basic aluminum panel patch jobs. Pros: Quicker welds, lower operator fatigue. Cons: Less control over thin metals, not ideal for cosmetic perfection.
- TIG (Tungsten Inert Gas) welding is precise and slow, perfect for thin-gauge aluminum found in premium vehicles. Pros: Cleaner welds, better for show-quality repairs. Cons: Requires more skill and patience. Not ideal for production-volume work.
Most high-end aluminum welding car repair projects in Dubai lean toward TIG. Precision matters, especially when color matching and layering paint over welded sections.
Specialty Welding Machines for Aluminum
Forget your basic steel rig. Repairing aluminum means investing in dedicated machines that:
- Support AC output (essential for TIG welding aluminum).
- Include advanced amperage control to manage thin panels.
- Have programmable settings for common aluminum alloys (like 5052 or 6061).
Shops serious about aluminum welding car repair usually keep separate rigs for aluminum-only work, stored in clean zones away from steel contamination.
The Must-Haves: Tools That Actually Matter
No aluminum job gets done right without these:
- Aluminum wire (typically ER4043 or ER5356 depending on application)
- 100% Argon gas (mixed gases don’t play well with aluminum)
- Wire brush – only stainless steel, dedicated for aluminum prep
- Heat lamps – critical for curing paint and post-weld drying
- Ventilation system – fume extraction in confined spaces
- Eye protection – not just goggles; auto-darkening welding helmets are ideal
- Gloves & flame-resistant aprons – protect skin without sacrificing precision
These aren’t wishlist items, they’re survival gear for anyone attempting aluminum welding car repair in a real-world garage.
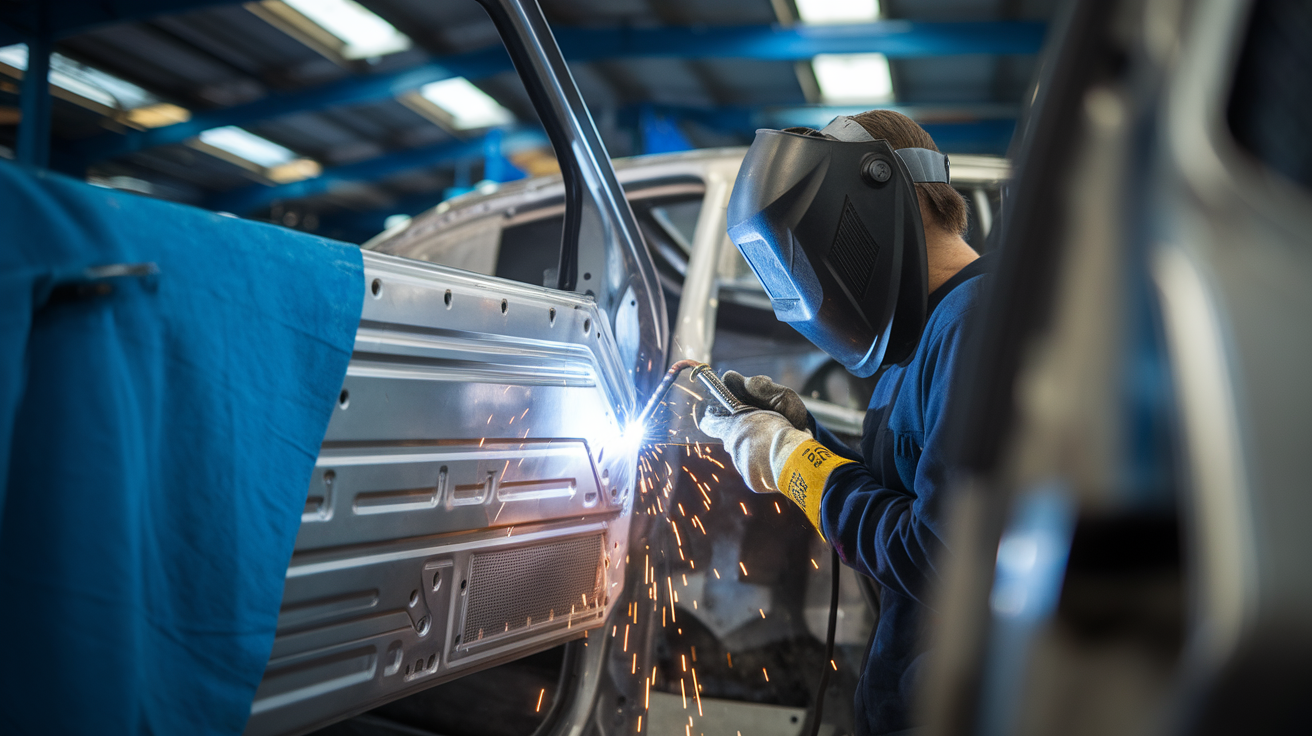
Safety Isn’t Optional | It’s a System
Aluminum produces bright arcs and intense UV, even more than steel. Not wearing proper eye protection? That’s a trip to the ER waiting to happen. Ventilation’s another biggie. Dubai’s enclosed workspaces trap fumes fast, and inhaling them isn’t something you shrug off.
TIP: Keep a portable fume extractor on standby. Cheap insurance for your lungs.
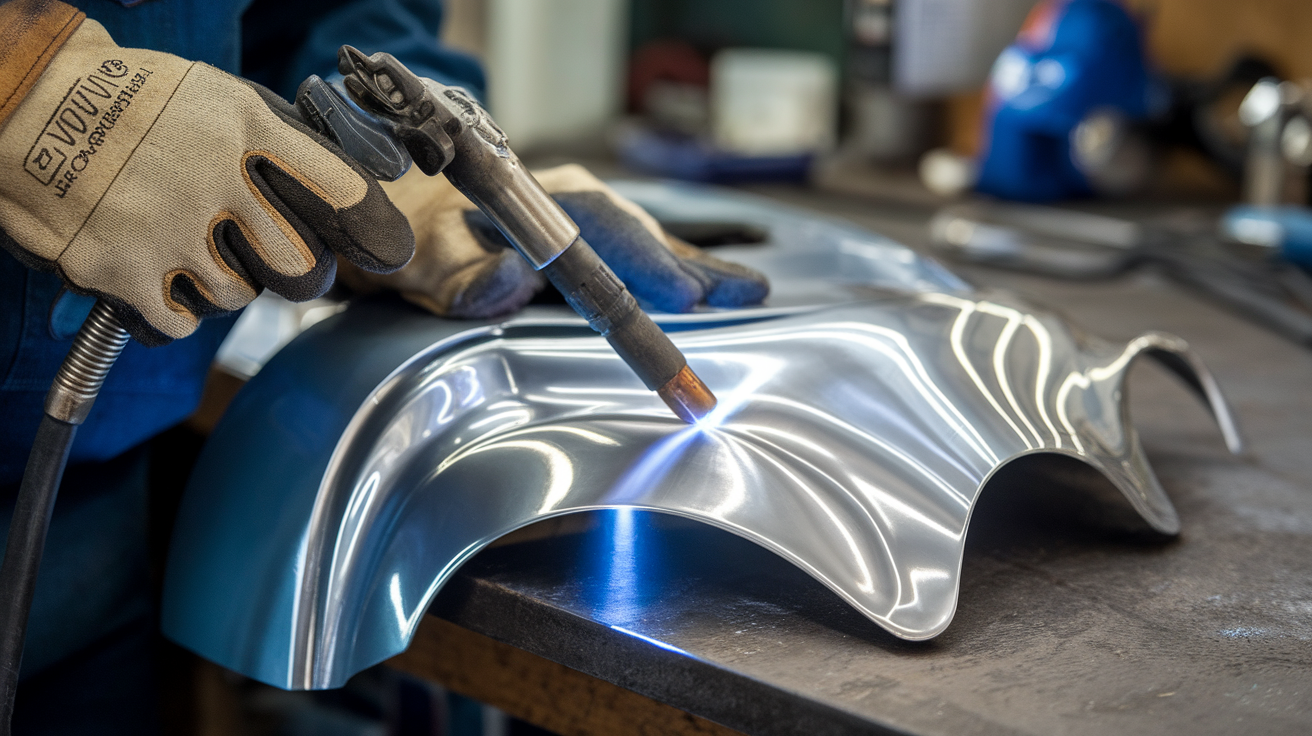
Why Heat Makes or Breaks Aluminum Welding Car Repair?
When you’re dealing with aluminum, temperature isn’t a detail; it’s the difference between a solid weld and a ruined panel. In aluminum welding car repair, every degree counts.
What You Need to Know About Heat?
- Ideal Weld Temps: Most aluminum welds require temperatures between 650°F to 800°F, depending on panel thickness and alloy composition.
- Heat Sensitivity: Aluminum heats up fast but doesn’t change color like steel. Easy to overheat without visual cues.
- Torch Control: Always monitor torch movement and dwell time. Slow passes risk panel distortion.
Curing Time & Heat Lamp Usage
- Post-Weld Curing: Use infrared heat lamps to ensure consistent drying of primers, basecoats, and clearcoats.
- Paint Layer Timing: Skipping proper curing between layers ruins automotive paint layering and causes delamination.
- Dubai Factor: Humidity and workshop climate need balancing—heat lamps help control drying in variable conditions.
Oxidation Issues & How to Fix Them
- Instant Oxidation: Aluminum begins oxidizing within minutes of exposure. Unseen, but deadly to weld adhesion.
- Prep Tools: Use acetone or aluminum-specific chemical cleaners. Scrub with a stainless steel wire brush only.
- Contamination Risks: Never use tools shared with steel cross-contamination causes galvanic corrosion under the paint.
Precision heat management is non-negotiable in aluminum welding car repair. Treat it casually, and you’ll spend twice the time fixing what’s supposed to be fixed.
Seamless Finish | Painting Techniques That Matter From Basecoat to Clearcoat Painting That Pops
Getting a flawless finish isn’t just chemistry; it’s craftsmanship. After all the structural work in aluminum welding car repair, the last thing you want is a paint job that looks “almost right.” In Dubai’s luxury market, almost doesn’t cut it. That showroom-ready look depends on how well your aluminum welding car repair transitions into seamless paintwork. Here’s how real technicians make paint look invisible and why the process matters more than most people think.
Paint Prep Starts in the Booth
- A proper spray booth setup isn’t optional, it’s essential. Dust, humidity, or improper air circulation can cause orange peel or fish-eye texture in your final coat during the aluminum welding car repair finish stages.
- Dubai garages often invest in climate-controlled booths to balance humidity and heat during painting stages, especially when wrapping up aluminum welding car repair work.
TIP: Before laying any paint, make sure the entire welded area from your aluminum panel has been sanded and cleaned with an adhesion promoter to avoid bubbling or peeling later.
Basecoat vs. Clearcoat | Layering That Works
- Basecoat: This is your actual color layer. Needs even application in cross-patterns to avoid streaking or patchiness over aluminum welds.
- Clearcoat: Transparent layer that locks in the color and gives gloss + UV protection. This final touch in aluminum welding car repair brings both durability and shine.
- The art is in timing; each coat requires a specific curing time before layering the next to complete the look after aluminum welding car repair.
Wet Sanding Between Coats
- Wet sanding between layers removes tiny imperfections and helps automotive paint layering bond better, especially crucial where new welds meet original panels in aluminum welding car repair.
- Use 1500–2000 grit sandpaper with water; it’s the smoothness behind the showroom look clients expect post-aluminum-welding car repair.
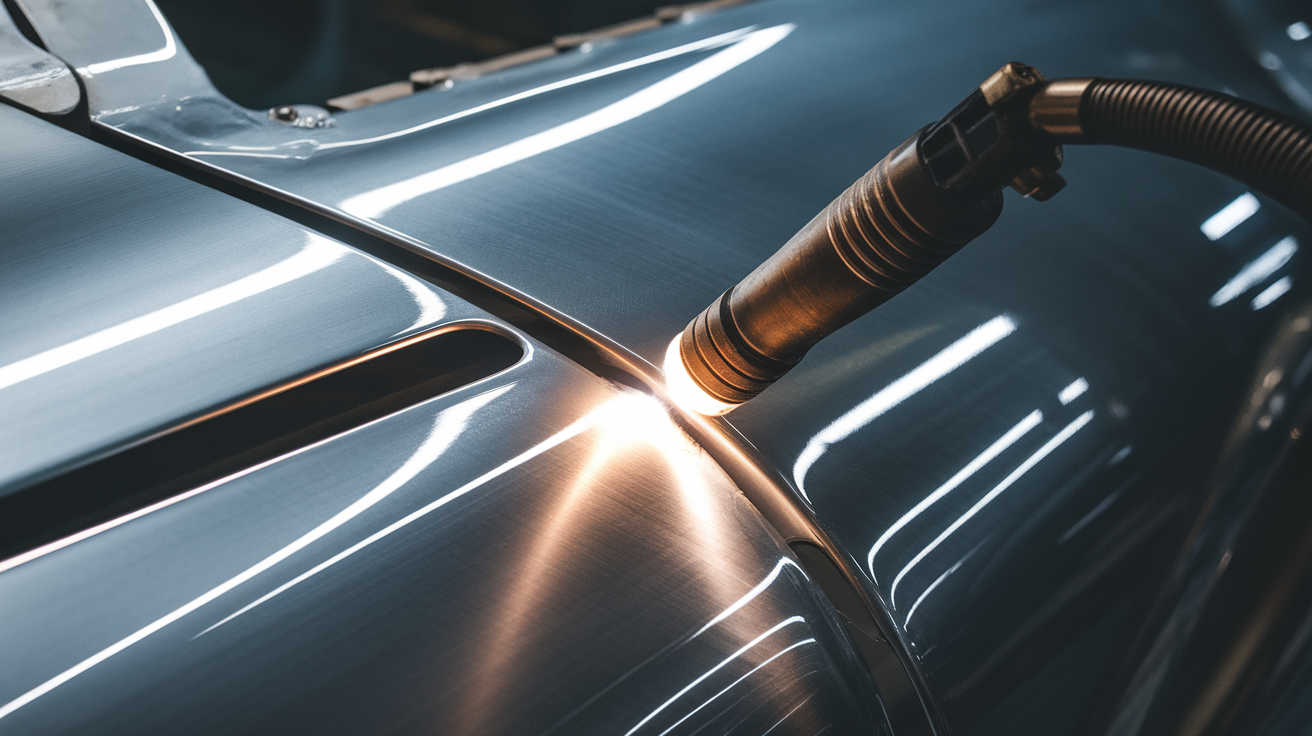
High-Gloss Finishing Tricks
- Apply a final clearcoat in 2–3 even passes, then cure it with heat lamps. Precision here defines whether the aluminum welding car repair looks invisible or improvised.
- Finish with orbital polishers and compound rubs to bring out depth and clarity after the weld blend is painted over.
- Dubai’s premium shops often use ceramic top layers for added brilliance and heat resistance in high-end aluminum welding car repair results.
Color Matching & Adhesion Tips
In aluminum welding car repair, the final paint finish can either seal the illusion or sabotage it. Even with flawless welding, if the color’s off or the paint peels a week later, it’s a fail. Dubai’s auto scene doesn’t tolerate mismatched panels, especially not on a freshly repaired Q7 or Range Rover. So how do pros make new paint look like it’s never been touched? Here’s what matters.
Precision Color Matching Starts With a Code
- Every vehicle has a paint code, often found inside the door frame or under the hood.
- Modern garages use digital paint scanners to read the existing finish—these help match wear, fade, and UV impact over time.
- After aluminum welding car repair, paint matching gets tougher—especially near high-gloss zones or complex curves.
- Always blend into adjacent panels; a perfectly matched square will still stand out if the next panel doesn’t reflect light the same way.
Paint Adhesion Problems| Why Paint Peels Off?
Aluminum welding car repair comes with a common headache: paint just won’t stick. Here’s why:
- Surface contamination – oil, moisture, oxidation, and leftover filler dust all sabotage bonding.
- Improper curing time – basecoat rushed before full evaporation causes bubbling.
- Skipping adhesion promoters – especially crucial on aluminum panels that resist bonding naturally.
- Humidity in the booth – Dubai’s coastal moisture creeps into paint layers fast.
Enhancing Paint Bonding After Weld Repairs
- Use etch primers or epoxy-based sealers specifically designed for aluminum.
- Lay down adhesion promoters before basecoat, not after.
- Sand between coats with fine grit to open up microchannels for bonding.
- Cure each coat fully with heat lamps before applying the next, especially important in aluminum welding car repair jobs.
Mistakes to Avoid
- Rushing between coats makes each layer vulnerable to peeling.
- Ignoring the weld seam, sanding smooth transitions matter in visual blending.
- Using a steel-compatible product, some fillers and primers react negatively with aluminum.
Troubleshooting Adhesion Problems After Aluminum Welding Car Repair
- Peeling Paint Within 48 Hours: This usually comes down to an incorrect or missing adhesion promoter. In aluminum welding car repair, aluminum surfaces are notoriously difficult to bond with regular primers. The fix? Sand it back down, apply an aluminum-specific sealer, and repaint from scratch.
- Bubbling Under Clearcoat: If bubbles appear, chances are you rushed the curing stage or worked in a booth with poor airflow and high humidity. After any aluminum welding car repair, use heat lamps to control drying time and improve ventilation to prevent moisture buildup.
- Patchy or Uneven Color: This stems from poor spray gun technique, either moving too fast or not overlapping correctly. In post-weld refinishing, especially with aluminum welding car repair, wet sanding the surface and repainting in slow, controlled passes solves it.
- Loss of Gloss or Hazy Finish: likely caused by skipping wet sanding between layers or applying clearcoat over a damp basecoat. Always check curing times and lightly sand to ensure your automotive paint layering bonds correctly.
Tip: Paint scanners help with color matching, but technique still wins. No digital tool replaces careful application.
Tutorial | A Step-by-Step Aluminum Panel Repair DIY Aluminum Welding Car Repair
Want to try aluminum welding car repair yourself or just understand what happens behind that garage door? Here’s how the pros approach it, step by step. This isn’t some YouTube shortcut. It’s the exact workflow technicians in Dubai use when restoring luxury panels to showroom standards. You’ll see why precision matters, and how each part, from weld prep to paint layering, builds toward invisibility.
Step 1| Cleaning and Prepping the Damaged Area
- Strip any wax, paint, or clearcoat from the panel. Use acetone or aluminum-specific cleaners.
- Sand off oxidation with a dedicated stainless steel wire brush. Never reuse steel-contaminated tools.
- Dry completely. Even leftover moisture throws off the entire weld in aluminum welding for car repair.
Step 2 |Tack Welding Using Proper MIG Settings
- Choose your filler wire: ER4043 for flexibility, ER5356 for strength.
- Use 100% Argon shielding gas. Any blend causes contamination.
- Set your MIG welder to AC output, with pulse control if available.
- Tack weld at edges first to reduce panel distortion during full passes.
Step 3| Managing Temperature While Welding
- Monitor panel heat with an infrared thermometer, stay between 650°F and 800°F.
- Weld in short bursts. Let the panel cool between passes to avoid warping.
- Dubai’s climate can raise baseline temps, so keep fans or AC flowing if indoors.
- Controlled heat is key. It’s the foundation of professional aluminum welding car repair.
Step 4 | Sanding Welds & Prepping for Paint
- Use fine grit (start at 400, finish around 800–1000) to smooth out weld ridges.
- Apply an adhesion promoter over the freshly sanded area.
- Mistake to avoid: skipping wet sanding between primer and basecoat. It ruins automotive paint layering.
Step 5 | Paint Layering & Gloss Finishing
- Spray basecoat in overlapping horizontal and vertical passes light and even.
- Cure with heat lamps for an accurate curing time before clearcoat.
- Apply clearcoat in 2–3 layers. Final result should match surrounding panels in tone, sheen, and gloss.
- Use an orbital polisher after drying for deep reflection. Most Dubai shops use ceramic topcoats on high-end aluminum welding car repair finishes.
Safety Reminders for At-Home Welders
- Use auto-darkening welding helmets; aluminum arcs are extremely bright.
- Keep ventilation running. Aluminum fumes are heavy and can linger.
- Never weld without flame-resistant gloves and clothing.
- Ground your equipment properly; aluminum’s conductivity makes electrical safety non-negotiable.
“I’ve seen DIYers in Dubai get brilliant results when they respect the process. One guy fixed his own Tesla fender. Took him three weekends, but you’d swear it was a pro job.”

A Moment in the Workshop “I’ve Been There”| A Welder’s Reflection
That summer, a crushed Jaguar F-Type rolled in, aluminum torn, emotion heavier than metal. The owner had lost his wife; she’d chosen the color. Every weld had to be flawless. Aluminum demanded precision, no second chances. Tack by tack, layer by layer, I rebuilt it, not just the panel, but the pride behind it. When he saw it, he whispered: “It looks better than new.” I’ve welded countless cars. But that one? That was a restoration of the heart.

