
That faded hood, those swirl marks catching sunlight, sometimes your car looks more tired than you feel after a Dubai summer commute. It is not about being flashy. It is about pride. When paint starts dulling out or peeling off, the car does not just lose its shine; it loses personality.
Whether you are an auto refinisher tackling a classic rebuild or just tired of your ride looking like it gave up, this guide walks you through how to paint a car the right way. We are talking real prep, basecoat depth, glossy clearcoat layering, and curing that holds up under Dubai’s heat. This is not a spray-and-pray job. This is about reviving a finish that makes you say, finally, that’s the look.
Step 1 | Painting Prep Is Where Most Jobs Go Wrong
Let’s be honest, if the surface isn’t prepped right, even the best paint won’t stick or shine. No matter how expensive your clearcoat is or how perfect the color match, paint will not forgive poor prep. Especially under Dubai’s heat and humidity.
Surface Cleaning | Start With a Clean Slate
Before you touch sandpaper or tape, clean the car like you mean it.
- Use an automotive degreaser or wax remover, not dish soap.
- Focus on door jambs, seams, and grooves. Paint failures often start there.
- Wipe down with lint-free microfiber, not recycled rags.
Quick tip: if your cloth feels greasy halfway through, toss it. Contaminants left on the surface will mess with adhesion, and redoing paint is not fun.
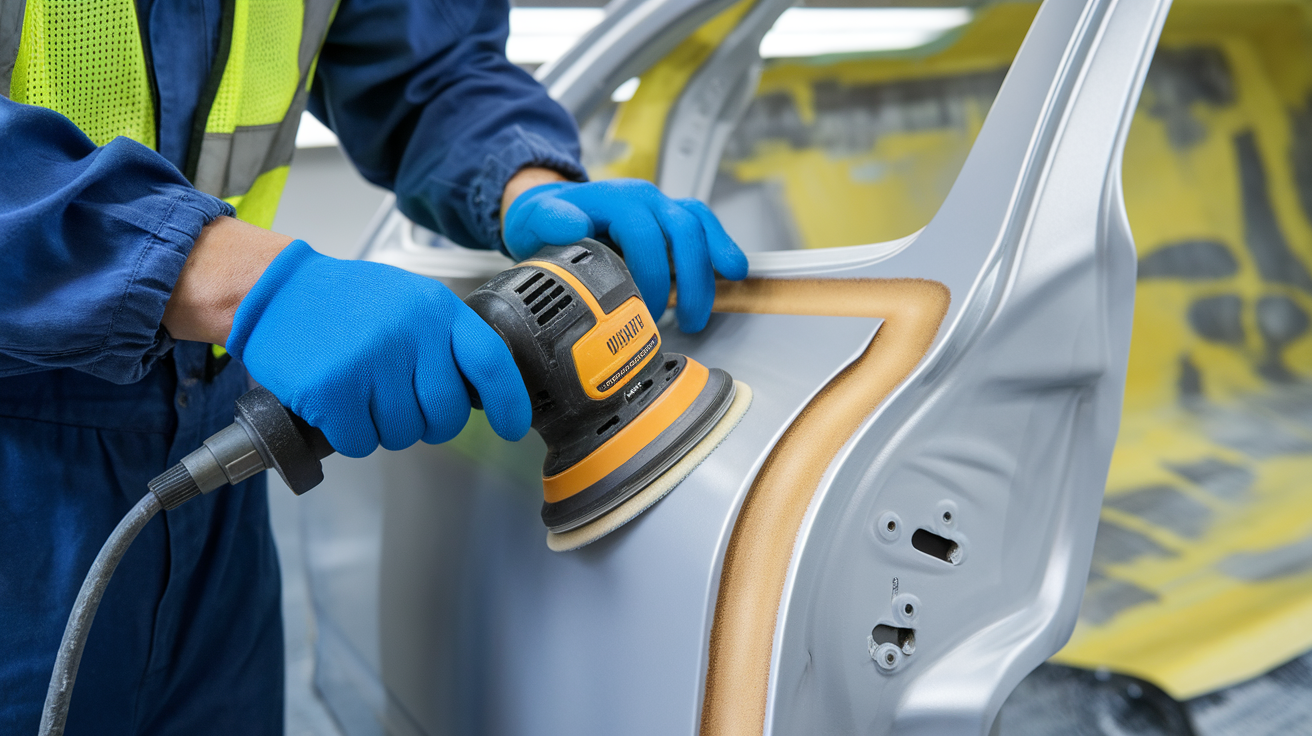
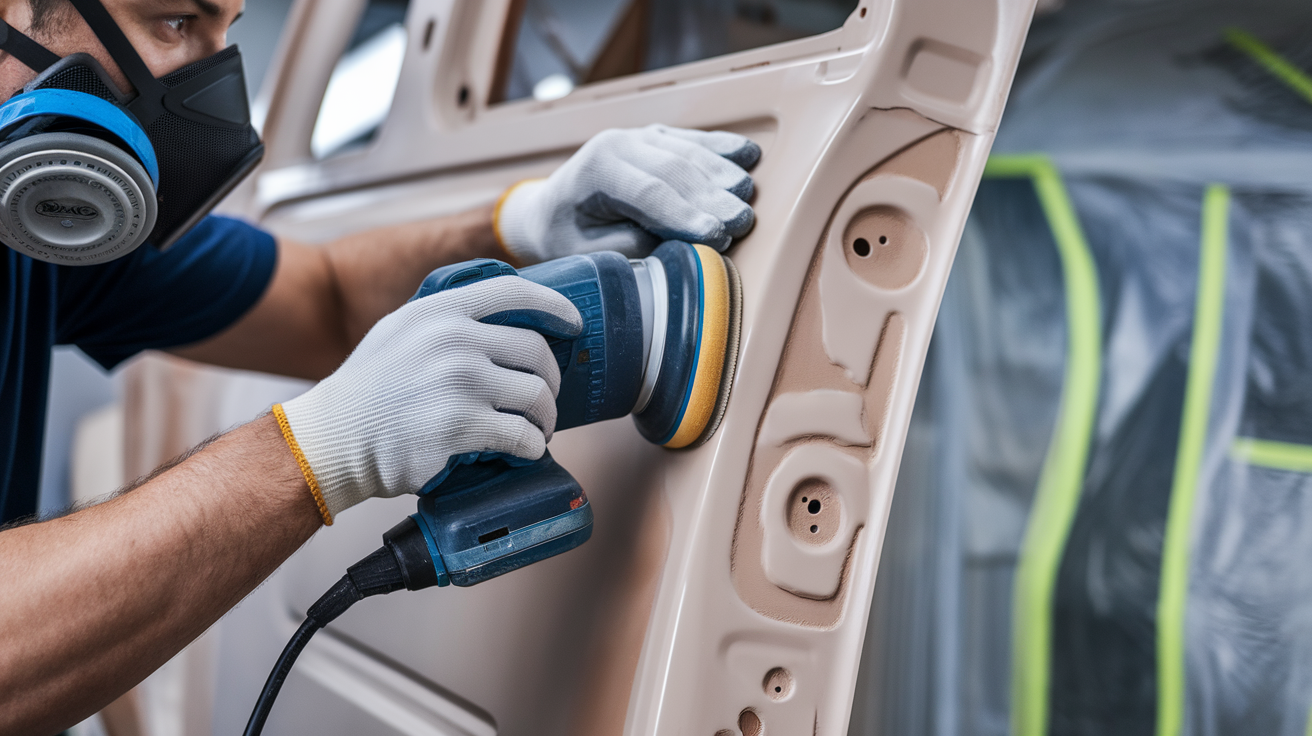
Sanding | This Isn’t Just Scrubbing Paint—It’s Surface Engineering
This is not just elbow grease, it’s geometry. You’re sculpting the tooth into the surface so paint can bond properly.
- Start with 400–600 grit for old paint and deep scratches.
- Move up to 800–1200 grit before primer goes on.
- For stubborn spots or curves, use foam sanding blocks to maintain contour.
If you hit bare metal, don’t panic, but do act fast.
Fact: In Dubai’s humid coastal areas, untreated metal starts reacting in hours. Apply an etching primer or rust inhibitor immediately. If you leave it exposed overnight, you’re risking corrosion beneath the paint that’ll creep up months later.
Step 2 | Primer Is Not Optional | It’s Essential
If you’re serious about painting a car properly, then primer isn’t negotiable. It’s the molecular handshake between your substrate and basecoat; without it, you’re painting over hope.
Primer Selection | Match Your Surface, or Regret It Later
You wouldn’t wear sneakers to a formal dinner. So don’t slap the wrong primer on the wrong substrate. Here’s your quick guide:
| Substrate | Recommended Primer Type |
| Steel | Epoxy or self-etching primer |
| Aluminum | Adhesion promoter + epoxy |
| Plastic | Flexible primer |
Pro tip: For aluminum, skip straight to an adhesion promoter first. Dubai’s heat and coastal moisture make aluminum notoriously difficult for paint to grip—epoxy alone won’t cut it.
Application | Thin Coats Win Races
Lay it on like you’re whispering, not yelling. Thick coats trap solvents and sabotage the finish.
- Spray in thin, even passes with a clean gun.
- Respect flash times, it’s not just chemistry, it’s peace of mind.
- Ventilate well. Solvent popping and delamination don’t just destroy results—they ruin reputations.
Paint a car like a pro, and the primer will never be the part you regret. Skip it—or rush it—and everything that follows will carry the consequences.
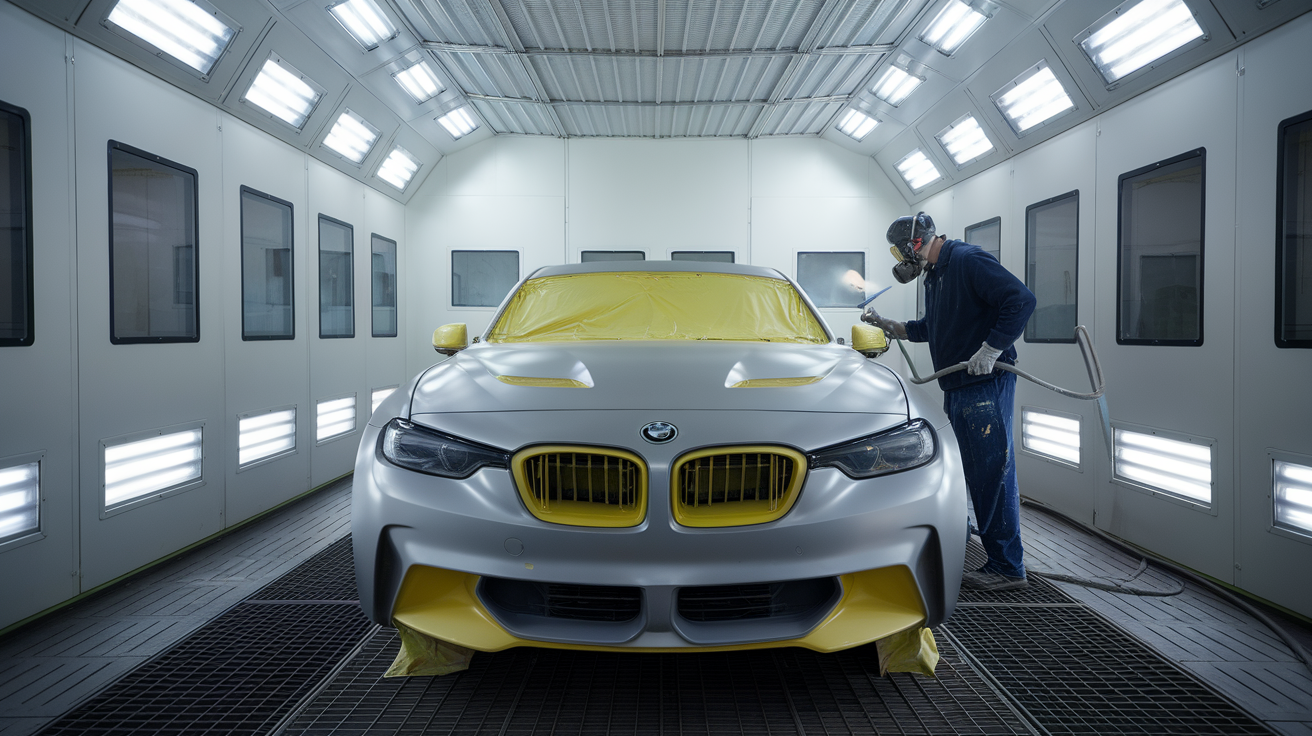
Step 3 | Basecoat Is Where Paint a Car Truly Begins
You don’t just paint a car, you bring it to life. Whether it’s candy red aggression or a deep navy whisper, the basecoat is where color finds its emotion.
Basecoat Application | Depth, Blend & Discipline
To paint a car with precision and pride, technique matters as much as the tint.
- Apply 2–3 medium coats, evenly spaced.
- Maintain consistent gun distance 6–8 inches is the sweet spot.
- Overlap each pass by 50% for smooth coverage.
- Blend into adjacent panels using feathering sprays to eliminate hard-edge lines.
Blending tip: Paint a car like it’s a single canvas. Even if you’re only refinishing one panel, color blending into nearby areas avoids harsh transitions that scream “patch job.”
Metallic Mastery | Flawless Finish or Flawed Failure?
Metallic paints require next-level finesse. A flawless blend makes the paint sparkle with uniformity; a poor one turns it blotchy and uneven.
- Watch how low air pressure causes blotches.
- Widen your spray pattern for consistent metallic flow.
- Don’t chase perfection in a single pass. Build it layer by layer.
Technician Insight: The moment the paint starts misbehaving, stop. adjust. restart. You only get one chance to paint a car right; the smart ones take that chance seriously.
Step 4 | Clearcoat Is Where You Paint a Car to Protect, Not Just Shine
You can paint a car with perfect basecoat technique, but without clearcoat mastery, that gloss will fade, and that pride will turn into regret. Clearcoat isn’t just protection—it’s what makes a car’s finish look immortal.
How to Apply Clearcoat | Armor, Gloss & No Room for Orange Peel?
To truly paint a car with excellence, clearcoat application demands discipline:
- Spray 2–3 wet coats, each one laid smooth and even.
- Wait 10–15 minutes between coats to allow proper flash.
- Maintain absolute booth cleanliness, as dust settles faster than you’d expect.
- Aim for a mirror finish. Orange peel is the enemy.
Real-world truth: Every technician who’s ever rushed the clear to save time has ended up sanding peel that looked like stucco. If you paint a car like that, you’ll never forget it, and neither will your client.
Final Finish | Patience Is the Secret Ingredient
The product won’t do the work for you. The gloss, depth, and long-term durability come from how you apply, not what you apply.
- Use a steady hand and a calibrated gun.
- Keep overlap tight, but don’t flood the surface.
- Let each layer breathe before you lock it in with the next.
Takeaway: You don’t just paint a car to look good today, you paint it to look better tomorrow. Clearcoat is your legacy in liquid form.
Step 5 | Curing Is the Silent Science Behind Every Great Paint a Car Project
It’s tempting to think the job’s done once the clearcoat’s laid down. But if you want to paint a car like a master, curing is where chemistry quietly takes over. Skip it, rush it, or ignore it, and you’ll be fixing what should’ve been flawless.
Drying vs. Curing | Know the Difference, Save the Finish
Drying gives you a surface that feels ready. Curing makes it truly ready.
- Drying: Solvents evaporate quickly, but it’s only skin-deep.
- Curing: Chemical hardening happens beneath the surface over time.
Your curing success depends on:
- Paint type (urethane, enamel, water-based)
- Booth temperature (ideal: 60–70°C)
- Humidity control
- Heat lamp placement (especially for spot repairs)
Smart move: When you paint a car under varying conditions like Dubai’s coastal moisture, you must actively control your cure environment. Ambient air won’t cut it.
Heat Lamps | Targeted Cure, Not Blind Baking
Infrared heat lamps are perfect for cooler zones or time-sensitive jobs. But with great heat comes great responsibility.
- Target only trouble areas, don’t roast the whole panel.
- Monitor surface temperature constantly.
- Avoid over-curing: it leads to discoloration and cracked clearcoat.
Technician Tip: The best way to paint a car fast is to cure it smart. There’s no shortcut to hardening paint that lasts.
Finishing Touches | Wet Sanding & Polishing Bring the Glory
Once cured (ideally after 24–48 hours), here’s where the art truly wakes up:
- Sand imperfections with 1500–3000 grit, using soapy water.
- Finish by hand or with a DA polisher + compound.
- Focus on mirror clarity and touchable depth, not just surface gloss.
True beauty emerges here. You didn’t paint a car just to make it look good; you did it to make people stare.
Troubleshooting | Mistakes Happen—Masters Correct Them
Even top-tier paint a car jobs hit unexpected speed bumps. Here’s how to diagnose and fix the most common issues:
- Orange Peel Texture
- Cause: Poor spray gun angle or incorrect paint viscosity
- Fix: Adjust gun settings and reflow the clearcoat evenly
- Peeling Clearcoat
- Cause: Inadequate surface prep or skipped flash time between coats
- Fix: Sand the affected area, apply primer again, and respray properly
- Paint Fading
- Cause: Long-term UV exposure or low-quality clearcoat
- Fix: Use high-grade clearcoat with built-in UV protection
Technician Confession: Once, we ignored booth humidity readings and ended up with “pearlescent haze” on a car that should’ve been jet black. Painful lesson: paint a car in a controlled environment or risk watching brilliance turn into blotches.
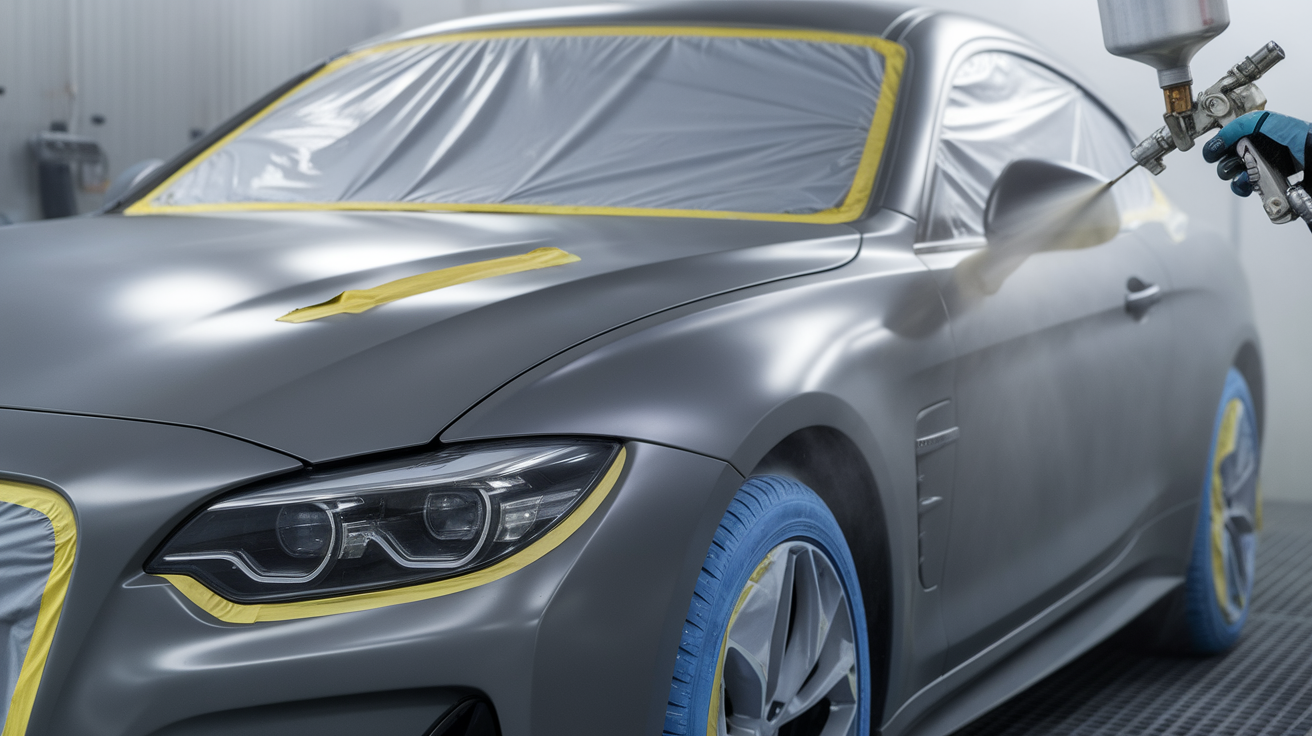
Step 6 | Masking Mastery | The Art of Clean Lines and Zero Overspray
Before the first drop of primer hits the panel, masking defines the boundaries of your craftsmanship. It’s not just tape, it’s its intention.
Techniques That Separate Pros from Patch Jobs:
- Use automotive-grade masking tape with clean edges, no painter’s tape from the hardware aisle.
- Mask rubber trims with edge-pulling techniques to avoid paint bleed.
- Cover wheels, glass, and grilles with static cling film or plastic sheeting, not newspaper.
- For multi-tone or custom designs, use fine-line tape to sculpt curves and transitions.
Pro Insight: Overspray isn’t just a cosmetic flaw; it’s a credibility killer. A clean mask job tells the client (or yourself), “This wasn’t rushed. This was respected.”
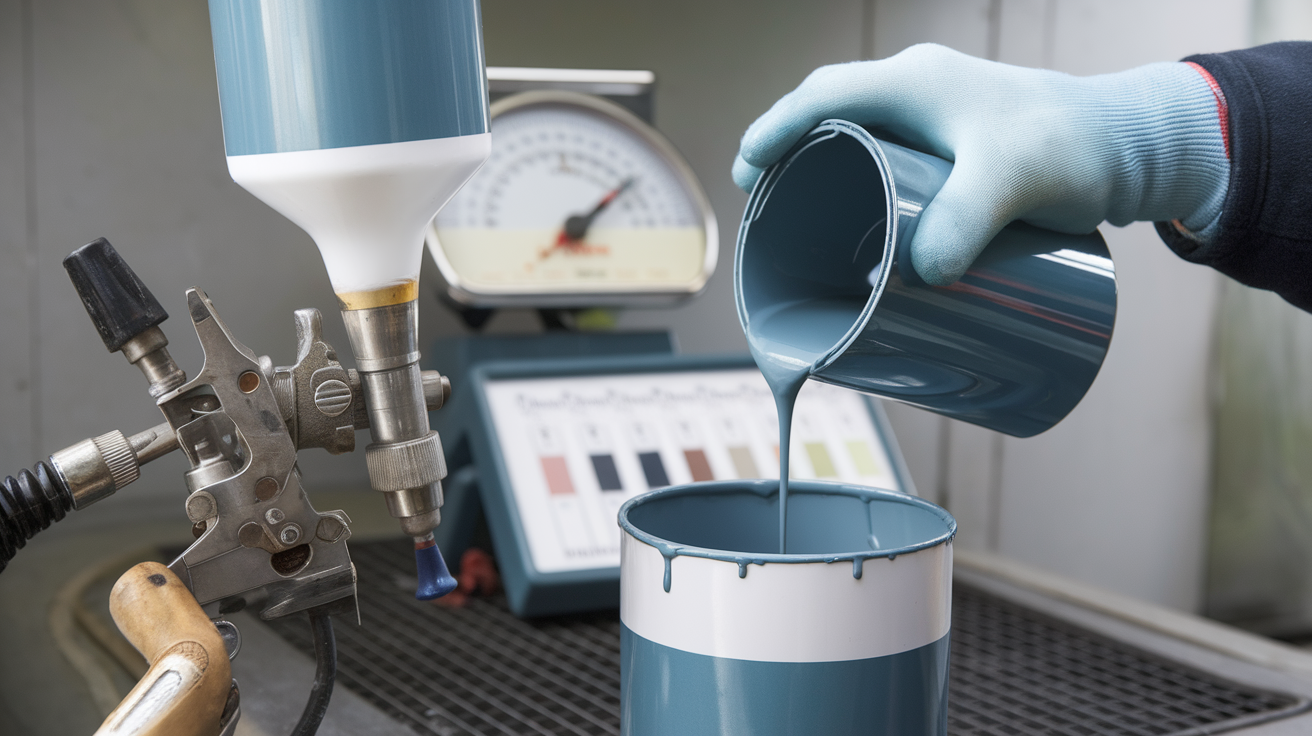
Step 7 | Paint Mixing & Gun Setup | Where Chemistry Meets Control
You can’t paint a car right if your materials aren’t mixed with precision and your spray gun isn’t dialed in like a surgeon’s scalpel.
Mixing Matters:
- Follow the manufacturer ratios exactly, don’t eyeball it.
- Use a digital scale or mixing cup with clear gradations.
- Stir thoroughly, then let the mix settle for 5–10 minutes before loading.
Gun Setup Essentials:
- Adjust PSI based on paint type and nozzle size (typically 25–30 PSI for basecoat).
- Test spray pattern on masking paper before touching the car.
- Clean the gun between coats residue buildup causes sputtering and uneven flow.
Technician Truth: A poorly mixed batch or misaligned gun can sabotage even the most meticulous prep. This is where science meets soul precision. Here means pride later.
Step 8 | Paint Booth Setup | Where Environment Meets Excellence
You can’t paint a car right in the wrong room. The booth isn’t just a workspace; it’s a controlled ecosystem where temperature, airflow, and dust discipline decide your outcome.
Essentials for a Pro-Level Booth:
- Maintain positive air pressure to keep contaminants out.
- Use intake filters rated for automotive paint change them regularly.
- Ground the floor to reduce static that attracts dust.
- Ideal booth temp: 22–26°C for basecoat, 60–70°C for curing.
Real-World Tip: In humid regions like coastal Dubai, install a dehumidifier to stabilize moisture levels. Even a 5% humidity swing can affect flash times and cause solvent pop.
Step 9 | Panel Alignment & Bodywork Integrity | Don’t Paint Over Problems
Before you lay down primer, check the canvas. Misaligned panels, uneven gaps, or hidden dents will betray even the most flawless paint job.
Checklist Before You Spray:
- Inspect panel gaps; consistency matters more than width.
- Use a straightedge to detect subtle warps or high spots.
- Address filler shrinkage with a guide coat and block sanding.
- Confirm door, hood, and trunk alignment before masking.
Technician Insight: Paint doesn’t hide flaws; it highlights them. A perfect finish on a crooked panel is like a tuxedo on a twisted frame. Fix the structure before you dress it.
When You Paint a Car, You Paint a Story
To paint a car is to translate emotion into color, care into detail, and ambition into shine. It’s not just about layers of paint; it’s about the layers of effort, precision, patience, and pride poured into every curve and corner. Every sanding stroke, every coat of primer, every polished clear—these are not just steps. They’re a testament to your standards. Whether you’re resurrecting a weather-worn daily driver or detailing a showstopper, this craft leaves fingerprints of character on every finish.
Because when the final panel gleams and the reflection is pure, it’s more than paint. It’s a declaration: I made this. I did it right.
So go ahead, paint a car like it deserves to be remembered.

