
Inspection-led accident repair in Al Quoz 4
Front End Collision Repair Dubai
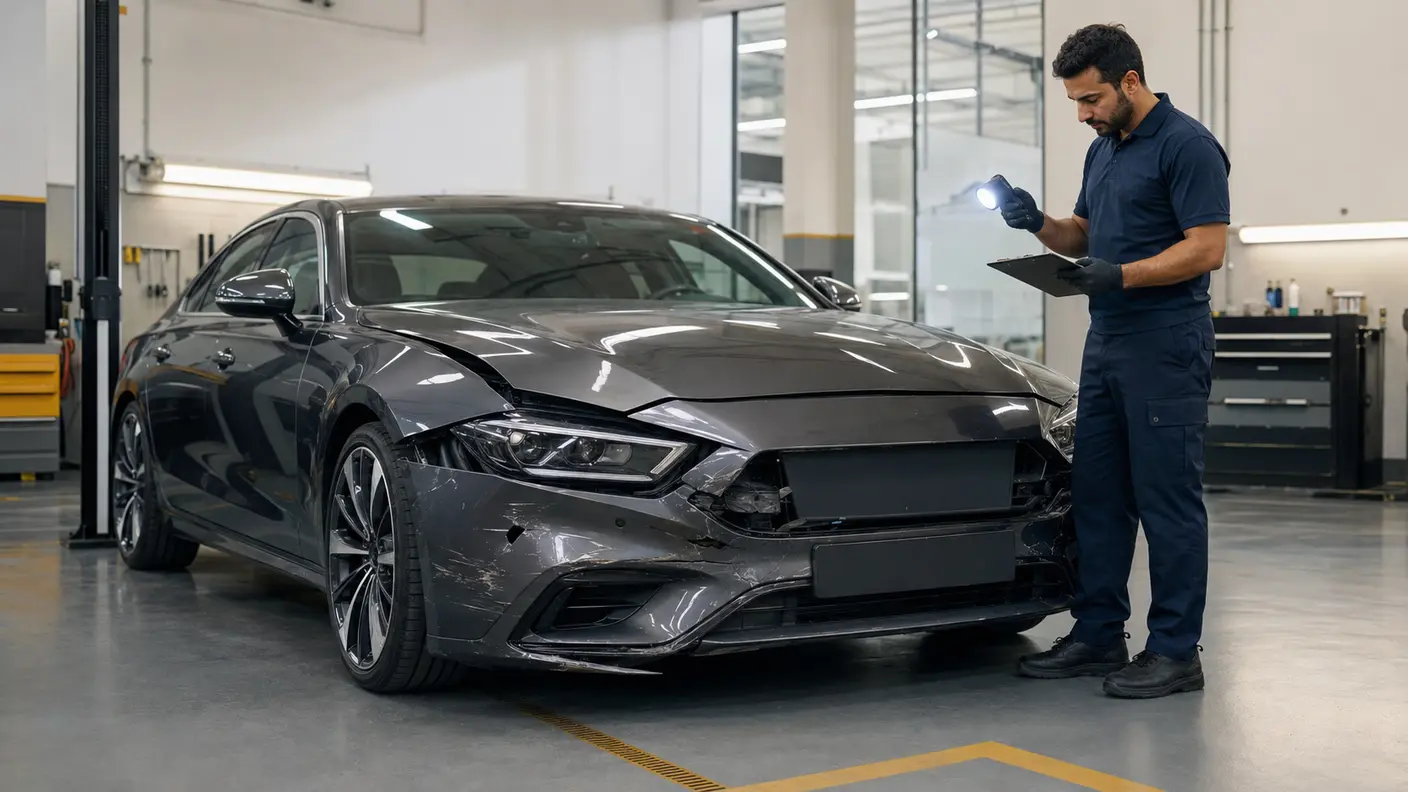
A damaged bumper is often only the first visible layer. We follow the impact path through bumper fittings, bonnet and fender gaps, lamps, the cooling area and wheel-adjacent zones before defining a repair scope.
The first useful question
Where did the front impact travel?
Front-end collision damage is rarely understood by looking at the bumper cover alone. Contact height, direction, speed difference, overlap and the object struck all influence which components may have absorbed or transferred the load.
A low parking impact may scuff paint, distort a lower grille or release bumper retainers. A corner hit may move the bumper end, fender edge, lamp mounts and wheel-arch liner together. A broader central impact can involve the bumper skin, absorber or reinforcement area, grille supports and the cooling pack behind them. These are examples of possible paths, not conclusions about an unseen vehicle.
Our accident repair service begins with the condition in front of us. We compare visible gaps, photograph the damage, listen to the driver’s report and identify what remains hidden. If safe removal of an exterior part is needed to expose mounting points, the initial estimate should mark that item as conditional until access is available.
That staged approach protects both quality and quotation clarity. It reduces the chance that a cosmetic price is mistaken for a complete collision assessment, and it gives the owner or insurer a record of why the scope changed if additional damage is found.
Impact-path map
Four layers can turn one visible mark into a wider repair
Not every impact reaches every layer. The value of the map is that it keeps the assessment in a sensible order and prevents an early cosmetic assumption from becoming the final scope.
Outer surface
Paint transfer, clear-coat scratches, cracks, distortion and split plastic appear on the bumper skin, grille surround or adjoining panels.
Fit and mounting
Retainers, clips, brackets, lamp tabs, liners and undertrays can loosen or break even when the visible part returns near its original position.
Energy-management area
The absorber and reinforcement region may need exposure after a meaningful impact. Exact construction varies, so conclusions follow the actual vehicle.
Systems behind
Cooling components, wiring, horns, lamps and fitted cameras or sensors sit behind or within the front assembly. Visual body assessment does not equal electronic diagnosis.
Visible versus hidden damage
A bumper can spring back while its supports remain displaced
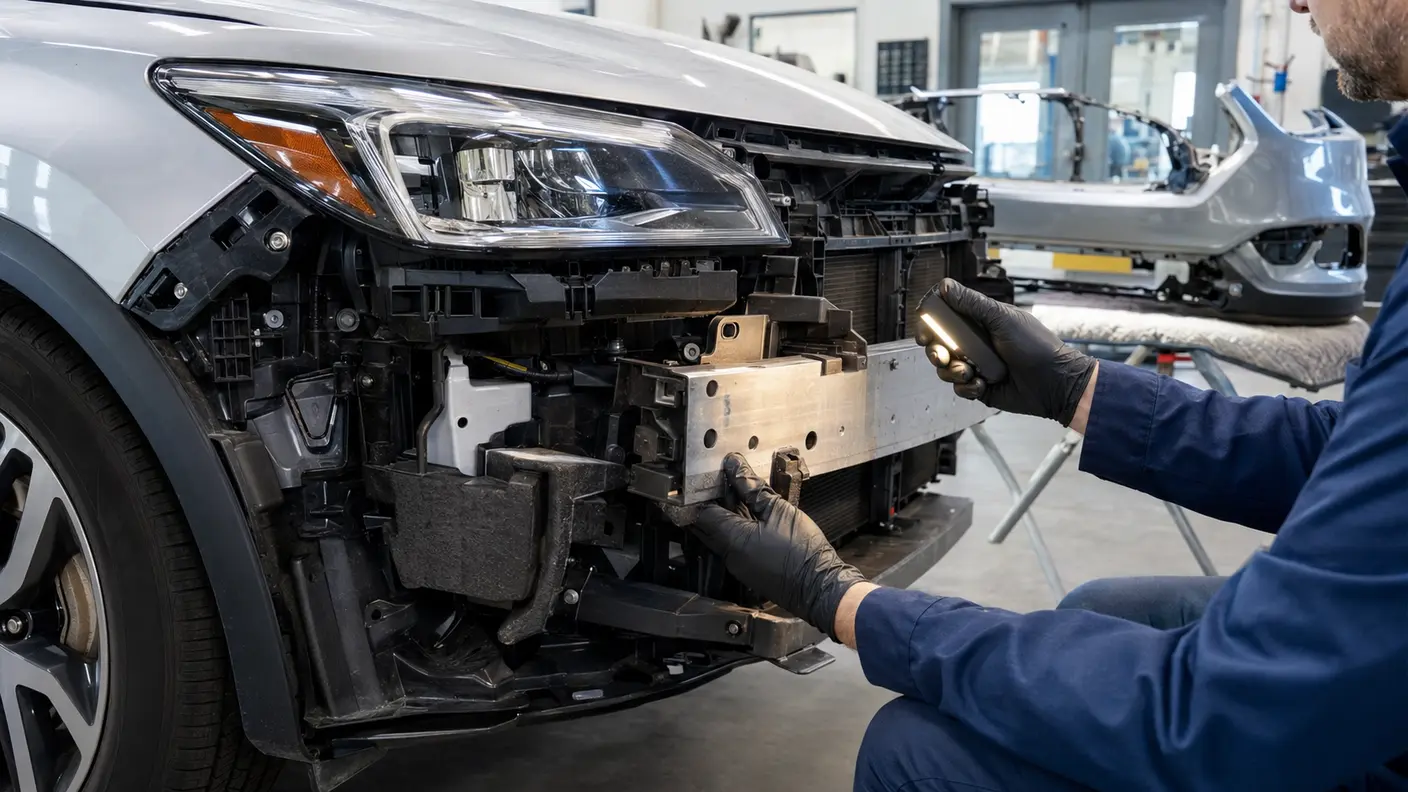
A flexible bumper cover can recover its shape after contact while clips, retainers, brackets or supporting parts behind it remain damaged or displaced.
Why the surface can mislead
A loose corner, widened gap, grille movement, rattle or poor lamp fit may point to broken clips, displaced retainers or damaged mounting areas. A neat outer surface can still conceal marks that appear only after removal.
When controlled access is justified
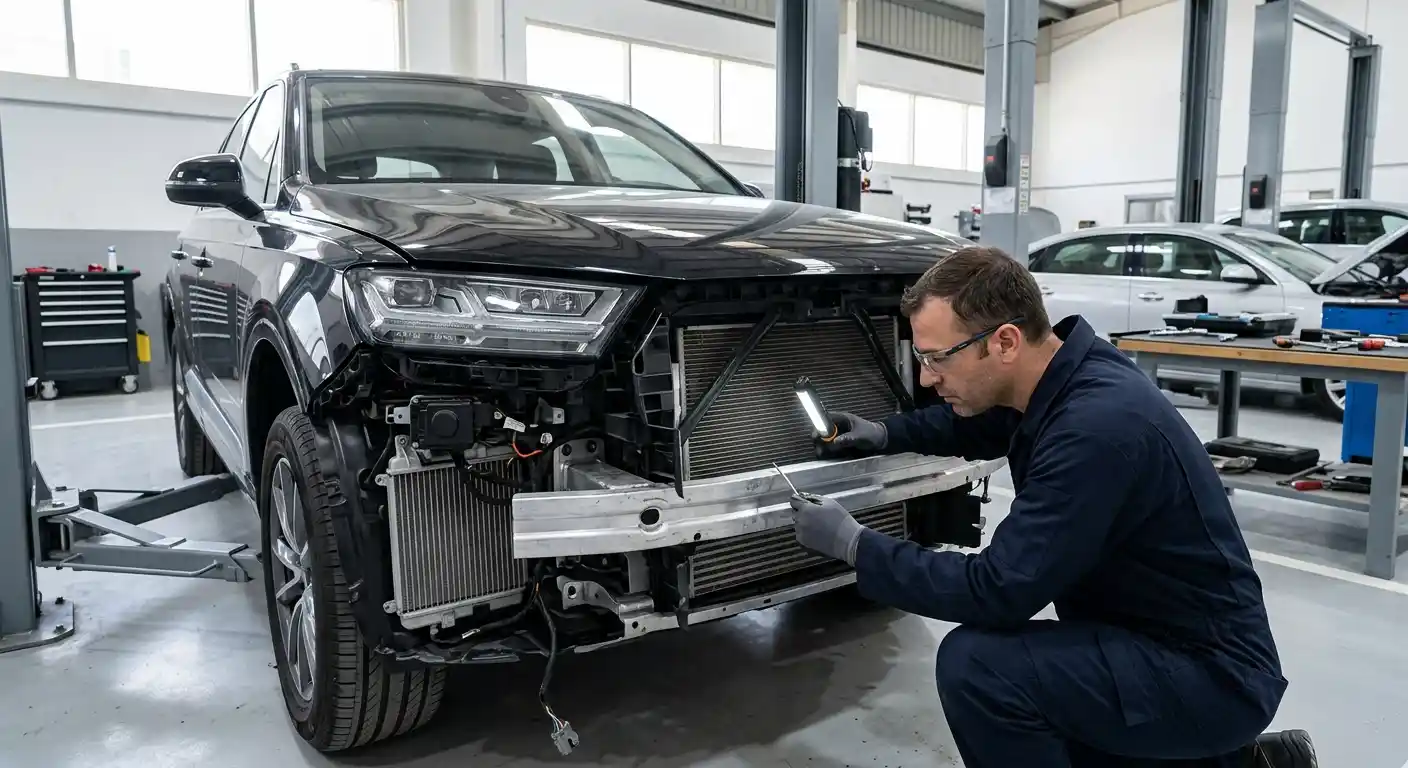
Parts are not removed automatically. Exterior checks may be enough after light contact with stable fit. Controlled access may be justified when the bumper is displaced, a lamp is loose, the lower edge is distorted or the reinforcement area cannot be seen.
Judge each layer separately
The cover, absorber and reinforcement have different roles. A repairable cover does not make every hidden part reusable, and one broken clip does not automatically require a complete bumper. Condition, attachment integrity, repairability, finish and parts availability guide the decision.
Before driving to a workshop
Some signs call for recovery or specialist advice first
This page covers body and paint repair. It cannot determine whether a damaged vehicle is safe to drive. Treat the following observations cautiously after a front impact.
Fluid, heat or odour
Visible leakage, steam, smoke, rising temperature, a strong fuel or electrical smell, or any fire concern should not be treated as a routine cosmetic drive-in repair.
Wheel or steering change
A tyre rubbing the liner, wheel displacement, severe vibration, a steering change or a vehicle that does not track normally can indicate concerns beyond the bumper skin.
Warning or lighting concern
New warning messages, damaged lamps, exposed wiring or poor visibility require appropriate attention. Quote the warning accurately rather than assuming its cause.
Use judgement: if the vehicle appears unsafe, do not continue driving merely to obtain a bodywork estimate. Follow available vehicle guidance and arrange suitable recovery or technical assessment.
Panel relationships
Bonnet, fender, lamp and grille alignment must be read together
A front corner is a network of edges. The bonnet meets the fender, the fender frames the lamp, the lamp meets the bumper and grille, and the bumper end returns into the wheel arch. A change in one mounting point can appear as several uneven gaps. Replacing or painting the most obvious panel without checking the network can leave the finished front end looking unsettled.
We inspect gap width along its length, not at one point. We look for a bonnet corner sitting high, a lamp housing pushed back, a fender edge pulled inward, a grille surround that no longer follows the bonnet line, or a bumper corner that releases under light pressure. We compare useful reference points on the opposite side where the design allows, while recognising that perfect visual symmetry is not proof of correct geometry.
Bonnet operation is also relevant. A changed closing effort, contact mark or latch concern should be recorded, but the cause should not be guessed from the outside. The same caution applies to powered bonnet features on vehicles that have them. Body-panel alignment and system diagnosis are different tasks.
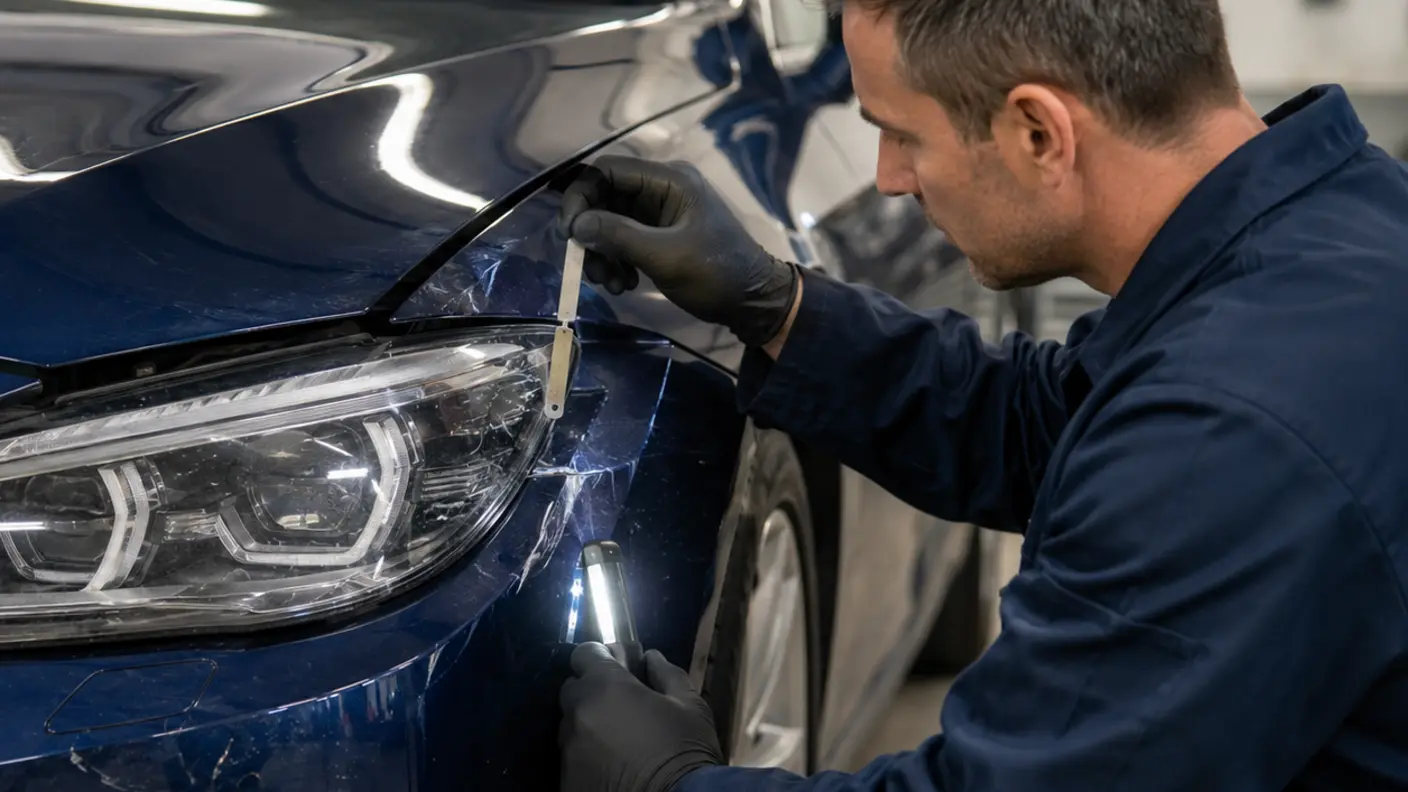
Accurate alignment affects more than appearance. It can influence edge clearance, weather sealing, lamp position and whether a repaired panel holds its intended relationship after normal use. That is why trial fitting may be part of the sequence before final paint and assembly.
Paint planning after geometry
Colour matching starts only after the front panels fit correctly
Bonnet, fender and bumper refinishing is planned after the repaired parts sit in their intended relationships. Vehicle colour information is a starting point; existing finish, previous paintwork, metallic or pearl orientation and the available transition area influence spray-out, colour comparison and whether blending is appropriate. Final review checks colour, texture, gloss and repaired edges on the assembled vehicle rather than judging a painted part in isolation.
Staged assessment
A front-end repair plan becomes more reliable in five steps
Incident intake
Record direction, contact height, drivability concerns, warnings and insurance details without inventing a diagnosis.
Walk-around
Photograph wide and close views, compare gaps and inspect the lower edge, wheel arch and adjoining panels.
Access decision
Identify which hidden areas need controlled exposure and what can remain conditional in the first estimate.
Repair plan
Separate repairable parts, replacement items, refinishing, external checks and insurer or owner approvals.
Reassembly review
Return to the intake record and check visible fit, finish, exterior operation and documented scope.
Areas beside the bumper
Hidden front-end concerns are not limited to body panels
The exact components and construction vary by make, model and specification. The inspection should follow the actual vehicle, especially after an offset impact or contact near a front wheel.
Cooling-pack area
Radiator, condenser, fans, ducts and supports may sit behind the grille and bumper assembly. Bent fins alone do not establish a leak, and no outside photograph can confirm internal condition. Visible fluid, steam, temperature change or a displaced assembly calls for appropriate assessment before cosmetic repair proceeds.
Fender and wheel-arch area
A corner impact may push the bumper end into the fender, liner or tyre zone. We look for rubbing, liner displacement, broken fasteners and changed wheel clearance. Steering, suspension or wheel concerns require suitable mechanical evaluation rather than a body-only assumption.
Headlamp and grille supports
A lamp lens can remain intact while a mounting tab or support is damaged. The grille can also look mostly present while its clips or surrounding frame have shifted. Fit, attachment and part condition should be confirmed before paintwork locks in the final position.
Cameras and parking sensors
If fitted, front cameras or sensors may be mounted in the bumper, grille or surrounding trim. We record their presence and protect them during bodywork. This page does not claim electronic diagnosis or calibration capability. Required checks should be identified separately.
Bonnet and latch region
Changed gaps, closing effort, edge contact or a distorted support area can alter the repair plan. A visual review can document those signs, but the latch and any powered or safety-related features should not be declared correct without the appropriate check.
Lower shields and air guides
Undertrays, splash shields and ducts are easy to overlook from standing height. Missing fasteners or torn mounting points can cause noise or movement after repair. Their condition should be included when the impact reached the lower front edge.
Airbags and restraint warnings
A meaningful front impact can involve airbags, seatbelt pretensioners or restraint-system warnings even when the body damage is concentrated ahead of the cabin. Deployment or a new restraint warning should be treated as a separate safety-system scope that needs appropriate diagnosis, parts and verification rather than being hidden inside cosmetic bodywork.
EV and high-voltage front areas
Electric and hybrid vehicles can package high-voltage cables, charging hardware, cooling components and isolation-related equipment around the front structure. Visible electrical damage, coolant loss or a high-voltage warning calls for vehicle-specific safety procedures before normal body repair continues.
Repair or replace
The best route depends on condition, not the part name
A repair decision should consider material, damage location, distortion, attachment points, previous work, available access, finish quality and the economics of parts supply. No single rule applies to every bumper, bonnet or fender.
Repair may be sensible when
- The bumper damage is a suitable scuff, deformation or repairable plastic split away from critical mounting concerns.
- A metal panel can be reshaped without leaving unstable edges, excessive filler or unacceptable contour.
- Attachment points remain sound or have an appropriate repair method for the specific part.
- Repair access and finish preparation allow a controlled result.
- The repaired route is proportionate once labour, materials and refinishing are included.
Replacement may be considered when
- There is severe tearing, stretching, folded damage or loss of shape that cannot be restored appropriately.
- Important mounting areas are broken or the part cannot be attached reliably.
- Previous repair, corrosion or material condition limits a stable new repair.
- Repair labour and risk approach or exceed a suitable replacement route.
- The required part is available and the complete fitting, paint and transfer scope is understood.
Parts pricing should not be read alone. A replacement bumper may require grilles, brackets, trims, retainers, transfers, paint materials and related labour. Conversely, a repairable cover may still sit beside hidden parts that need replacement. The quotation should show those distinctions clearly.
Impact-depth cost planner
Indicative Dubai bands, organised by how deep the repair travels
These planning figures are not package prices. Start at the first row that matches the visible work, then consider whether fit, hidden damage, replacement parts or structural concerns add another layer after inspection.
Light bumper polish or transfer removal may start here when the finish condition and mark depth suit polishing. A scratch through colour needs a different route.
For suitable bumper-cover damage requiring plastic repair and refinishing. Tears, mounting damage, fitted equipment and previous repair can change suitability.
Planning band for preparing and repainting a complete bumper cover. Repair, removal, trim, parts and hidden damage may be additional.
A larger conventional dent with paint may sit in this range. Panel painting starts from AED 450, but bonnet or fender scope depends on damage, material and blend requirements.
Broad planning range for bumper replacement. Vehicle specification, part type, grilles, brackets, transfers, finish and supply conditions strongly affect the total.
Broad range for structural or chassis-related repair when such work is actually confirmed. Severity, measurements, materials and related parts can move the figure beyond this band.
Indicative only: physical inspection is required. Make, model, material, parts, finish, access, previous repair, hidden damage and current market conditions affect the final quote. Do not add every band together mechanically. The estimate should identify confirmed work and provisional items.
Insurance documentation
A clear evidence trail supports a clearer accident estimate
An insurance repair may require incident documents, photographs, a repair estimate, approval and sometimes supplementary evidence after dismantling. The exact process depends on the insurer, policy and claim. We can document visible body damage and prepare a repair scope, but we do not decide policy coverage, excess, liability or settlement.
At intake, wide photographs establish which end and side were involved. Close images show paint, cracks, gaps and part condition. Lower-angle views can record the underside of the bumper and wheel-arch area where safe. If controlled dismantling later reveals broken mounts or hidden deformation, new photographs should connect those findings to the original impact area.
The estimate should separate labour, paint, repairable panels, replacement parts and conditional items. If the insurer has not approved a provisional item, that status should remain visible. This is more useful than hiding uncertainty inside one total.
If your repair is claim-related, bring the available police or incident report, claim number, vehicle registration details and insurer correspondence. Confirm your excess, coverage and approved repair route directly with the insurer.
Time and parts
Repair time and waiting time should not be confused
The bodywork itself is only one part of the schedule. Approval, dismantling, hidden findings, parts supply, trial fitting, paint preparation, curing, reassembly and final checks can each affect delivery.
Damage depth
A surface repair can move quickly. A multi-panel impact with hidden mounts, cooling-area concerns or structural checks needs a more cautious sequence.
Exact parts
Variant, side, fitted technology, finish and part supersession can affect identification. A verbal description is not enough for final ordering.
Owner or insurer
Work should pause when a newly revealed item needs approval. Supplementary decisions can add waiting time even when the workshop work is straightforward.
Trial assembly
Bonnet, fender, lamp, grille and bumper relationships may need checking before final paint and permanent reassembly.
Paint process
Preparation, masking, colour evaluation, application, curing and polishing require their own time. Spraying is not the whole refinishing process.
Handover review
Fit, finish, exterior functions within scope, cleanliness and documentation should be reviewed against the original intake record.
Planning advice: ask for a range after inspection and parts checks, not a promise based on one photograph. A realistic schedule should identify what is known and what could still extend it.
Paint and finish
Front-end refinishing must work across several viewing angles
The bonnet is seen as a broad horizontal surface, while fenders curve vertically and bumper covers use a different substrate. Metallic and pearl colours can respond visibly to spray orientation, film build and lighting. The repair plan should therefore consider the whole visible relationship, not only the colour code.
Preparation depends on whether the part is repaired, new, previously painted or supplied with a coating that needs the appropriate process. Edge damage, stone chips, old filler and previous colour variation can affect what is reasonable. A localised repair may suit some damage, while other conditions require a wider refinishing area to manage colour and finish transition.
Our car painting service focuses on substrate preparation, controlled application, texture relationship and final inspection. No page can promise an invisible result for every colour or previous repair. The practical objective is a stable, well-prepared finish judged on the actual vehicle under useful lighting.
After refinishing, visible edges, texture, gloss and colour relationship are reviewed before handover. Owners should also receive reasonable aftercare guidance for the fresh finish.
Final handover
The last inspection returns to the first impact map
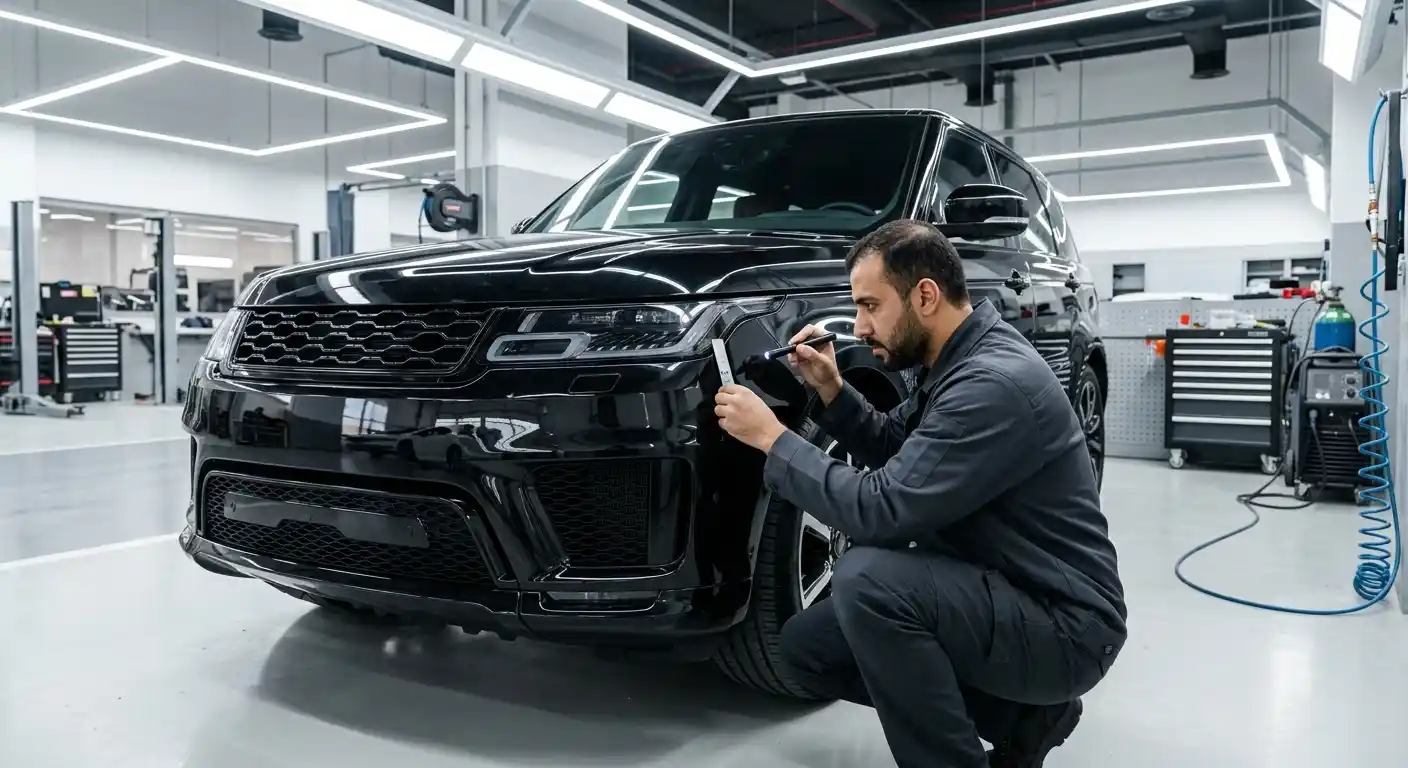
A front-end repair should not be handed over on shine alone. We return to the intake photographs and agreed scope. The visible contour, panel gaps, bumper seating, grille and lamp fit, wheel-arch trim, lower shields and repaired finish are checked where included in the work.
Exterior operations disturbed during bodywork should be reviewed within the limits of the service. Where cameras, sensors, warning systems, cooling components, steering or suspension require checks outside body and paint scope, those boundaries should be stated clearly. A visual body inspection must not be represented as calibration or specialist mechanical validation.
The handover record should identify repaired parts, replaced parts, paint areas and any outstanding or separately referred concern. That clarity helps the owner understand what was completed and avoids turning an unrelated future symptom into an assumption about the body repair.
- Compare visible gaps and contour with intake observations.
- Confirm bumper ends, grille, lamps and liners sit securely.
- Review paint colour, texture, gloss and repaired edges.
- Check accessible exterior operations disturbed by the work.
- Remove repair residue and inspect the area under useful light.
- Explain completed scope, aftercare and any separate concern.
Common questions
Front-end collision repair FAQs
Can you estimate front-end collision damage from photos?
Photos are useful for triage and preparation. Wide, close and lower-angle views can show the main panels, gaps and visible marks. They cannot reliably reveal every broken mount, absorber concern, cooling-area issue or previous repair, so the final scope and quotation require physical inspection.
Does a cracked front bumper always need replacement?
No. Some bumper-cover cracks or deformations may suit plastic repair and refinishing. Severe tears, distorted mounting areas, unsuitable material condition or poor repair economics may support replacement. Hidden retainers, grilles and fitted equipment also affect the decision.
What damage can hide behind a front bumper?
Possible findings include broken retainers, clips, brackets, absorber damage, reinforcement-area marks, displaced ducts, damaged lamp mounts or lower shields. The exact design varies by vehicle, and not every impact reaches these parts. Controlled access may be needed after a meaningful collision.
Can I drive after a front-end collision?
A webpage cannot determine that. Do not treat visible fluid, steam, smoke, unusual heat or odour, tyre rubbing, wheel displacement, severe vibration, steering change, damaged lighting or new warnings as routine cosmetic damage. Follow suitable vehicle guidance and arrange recovery or technical advice if safety is uncertain.
How much does front bumper repair cost in Dubai?
Indicative planning bands include light bumper polishing from AED 150, plastic repair plus paint at AED 500 to AED 1,200, and complete bumper repainting at AED 600 to AED 1,500. Inspection is required because damage, material, finish, fittings and previous repair affect the quote. For a fuller comparison of scuffs, cracks, replacement parts and sensor-related extras, see our bumper repair cost Dubai guide.
How much can front bumper replacement cost?
A broad indicative range is AED 1,200 to AED 6,000 or more. The vehicle, exact bumper, grilles, brackets, trims, fitted equipment, paintwork, labour, parts supply and hidden damage can move the final figure.
Why did the estimate change after the bumper was removed?
The first estimate can only include what is visible or reasonably accessible. Agreed dismantling may reveal broken mounts, displaced supports or other impact-related damage. A supplementary estimate should document the new findings and obtain approval before added work.
Can bonnet and fender damage be repaired instead of replaced?
Sometimes. The decision depends on material, dent depth, folds, edge damage, attachment points, access, previous repair and the ability to restore stable shape and fit. Replacement may be more sensible when damage is severe or repair risk and labour become disproportionate.
Do you calibrate front cameras or parking sensors?
No calibration capability is claimed on this page. We can identify fitted exterior equipment, protect it during bodywork and document its position. Electronic diagnosis, calibration or other required technical checks should be identified separately.
Can you help with insurance front-end accident repair?
We can document visible body damage and prepare a repair estimate. Insurer approval, coverage, excess, liability, required reports and settlement remain subject to the policy and insurer. Newly revealed damage may require supplementary evidence and approval.
How long does front-end collision repair take?
Timing depends on damage depth, dismantling, approvals, repair method, parts availability, trial fitting, paintwork, curing, reassembly and hidden findings. A realistic estimate separates active workshop time from waiting time after the vehicle is inspected.
What is checked before the vehicle is handed back?
The review returns to the intake record and agreed scope. It can include visible panel gaps, bumper seating, grille and lamp fit, liners, lower shields, paint colour, texture, repaired edges, cleanliness and accessible exterior functions disturbed during bodywork. Separate specialist checks should remain clearly identified.
Start with evidence, not assumptions
Arrange a front-end collision assessment in Dubai
Send wide and close photographs with a short description of the impact direction. We will use them to prepare for inspection, then define confirmed bodywork, provisional items and the next approval step from the vehicle itself.