
Cover, mountings, trim and adjoining fit
Front Bumper Repair Dubai
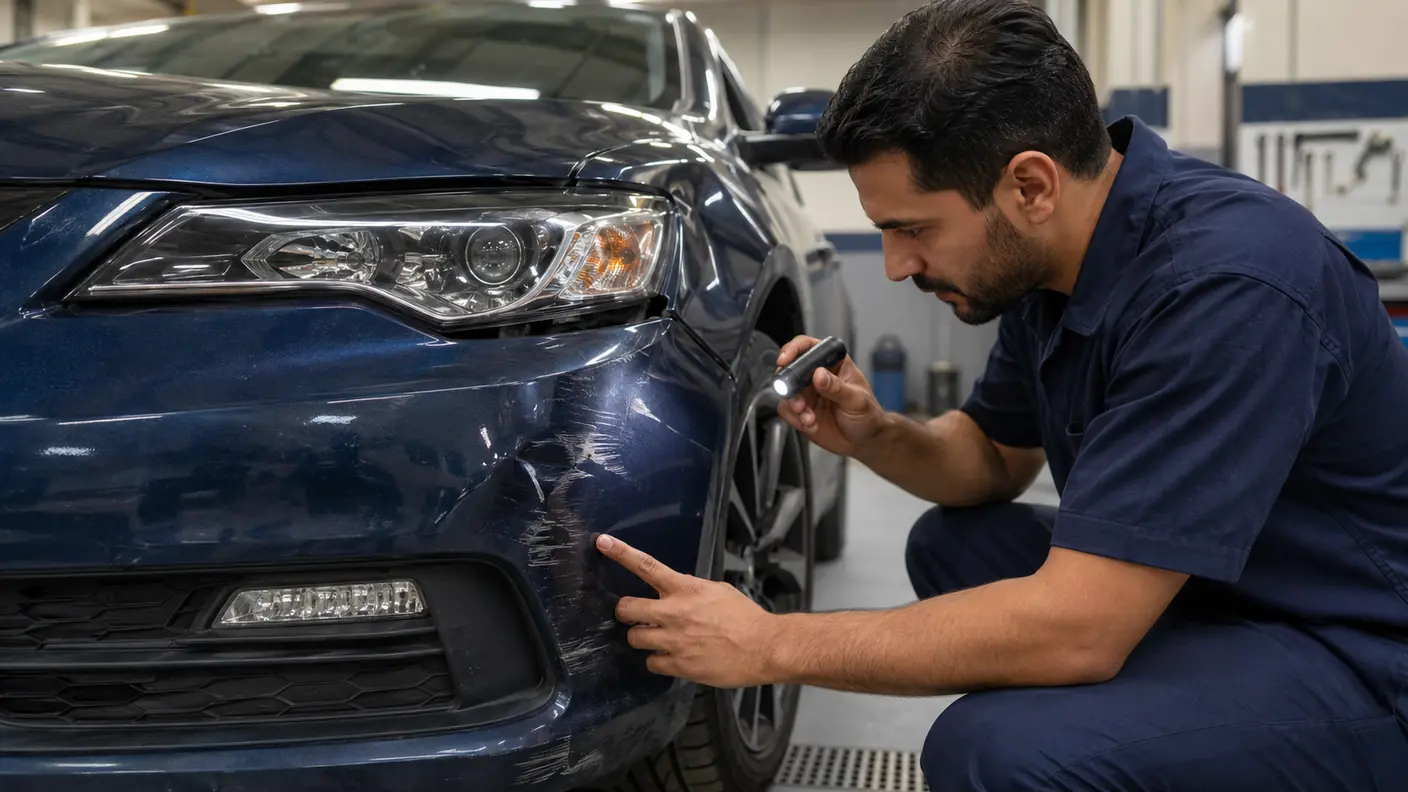
A front bumper mark may stop at the painted cover, or it may continue into tabs, retainers, grilles, lower trim and nearby panel relationships. We inspect the complete front corner, explain what is confirmed, and choose between correction, plastic repair, refinishing or replacement only after the damage route is understood.
Start beyond the visible scuff
A bumper cover is only the outer layer of the front corner
The first question is not simply whether the bumper can be painted. It is whether the contact changed only the surface or also affected how the cover is supported, aligned and connected to the surrounding front corner.
Identify what sits behind the painted cover
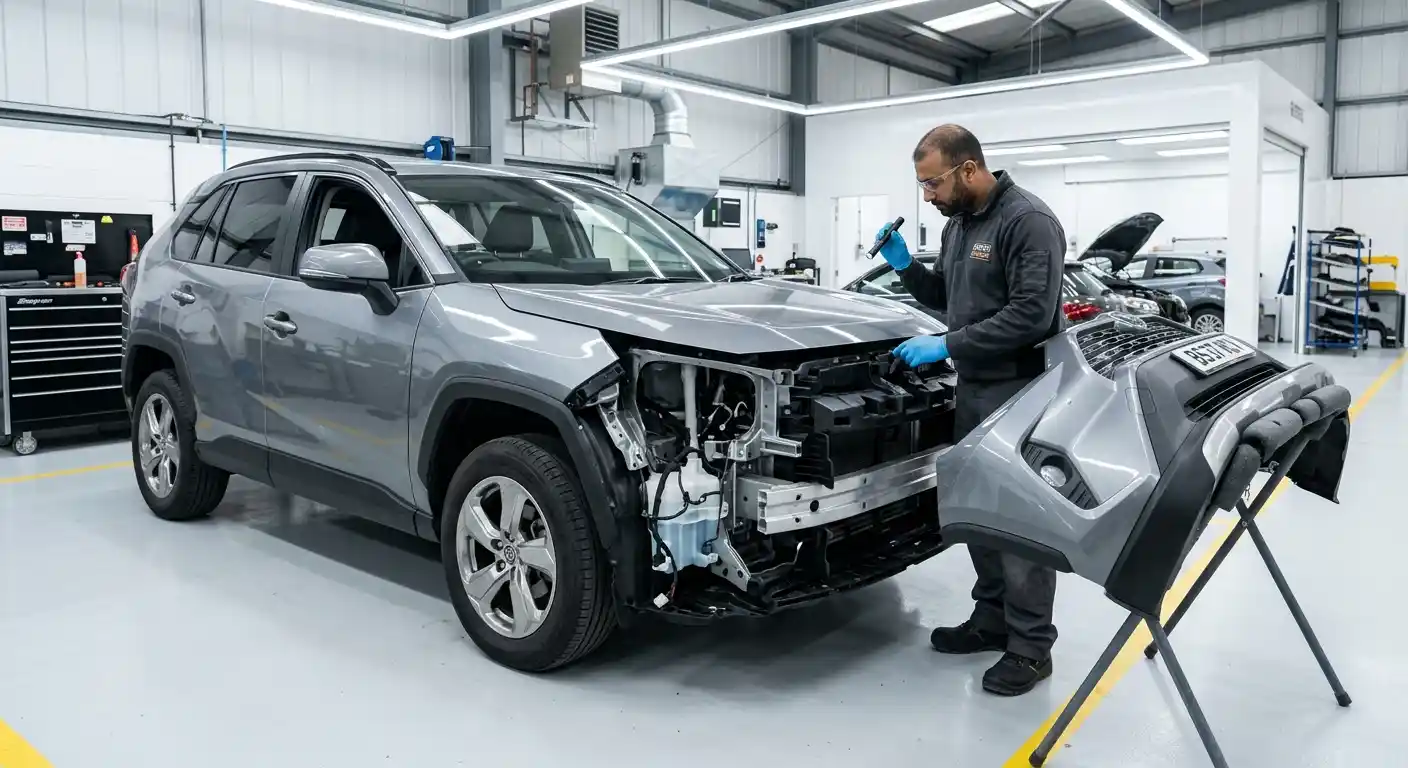
Front bumper construction varies by vehicle. The visible cover is commonly moulded plastic, but its exact material, thickness and repair response should be identified where possible. Behind or around it can be an absorber, reinforcement, side retainers, brackets, grilles, lower valances, lamps, air guides, fasteners and openings for fitted equipment. Not every front impact reaches those items, but their proximity means they should not be ignored when the cover has moved.
Read surface damage and alignment together
We begin with a clean, dry view of the full front. Directional light helps separate paint transfer from a scratch through clear coat, colour or primer. The cover is checked for indentation, stretching, a sharp fold, a split or a changed edge. Where useful, the opposite side provides a comparison for the cover-to-fender joint, lamp surround, grille line, bonnet relationship and lower edge.
01 Spring-back clues: Check stress whitening, cracked paint, proud edges, weakened tabs and disturbed grille or lower-trim mounts.
02 Confirm before pricing: Quote the bumper plus only inspected adjoining damage; a scrape alone does not prove work is needed behind the cover.
Send one full-front image, one close view, one low-angle view and one photograph of the bumper-to-fender edge. A single straight-on close-up often hides depth and alignment.
Trace the contact route
Five zones turn a vague bumper quote into an inspectable scope
Inspection follows the contact from the visible surface to the accessible components behind it. Each zone is included only when the damage and authorised access justify it.
01 Paint and cover shape: Separate transfer from scratches, exposed plastic, gouging or deformation before choosing cleaning, repair or refinishing.
02 Tabs and side retainer: Check guides, clips and mounting tabs when the cover sits proud, loose or uneven beside the wheel arch.
03 Lamp and fender relationship: Confirm that the bumper, lamp, fender and bonnet lines remain coherent and securely attached.
04 Grille and lower trim: Inspect grilles, bezels, splitters, valances and air guides for broken connections or displaced edges.
05 Accessible inner components: Inspect the absorber, reinforcement and nearby supports only when impact evidence or authorised dismantling makes them relevant; a cosmetic scuff alone does not prove hidden damage.
Classify before pricing
Common front bumper damage does not share one repair method
A useful estimate names the damage type and the affected layer. It should not compress every mark into the phrase bumper repair.
Transfer and light surface marks
Foreign paint or rubber can make damage appear deeper than it is. Controlled cleaning and polishing are considered only after confirming that the vehicle coating remains suitable.
Scratches and gouges
A scratch may remain in clear coat, cut through colour or expose plastic. Depth, width, edge condition and surrounding finish guide preparation and refinishing.
Dents and distorted corners
Heat response, plastic memory, stretching, sharp folds and previous repair affect whether shape can be restored without leaving an unstable surface.
Cracks and splits
Crack position, length, contamination, edge loss, material identity and proximity to a mounting point determine whether plastic repair is sensible.
Broken tabs and retainers
Fit damage can be more important than the face mark. The cover, tab, guide, retainer and fastener need to be separated in the estimate.
Lower-edge and kerb damage
Low contact can scrape the underside, deform an air deflector, loosen trim or affect fasteners that are difficult to judge from normal standing height.
Mounting damage deserves its own line
Attachments can need a separate decision even when the cover is repairable
Tabs, retainers, fasteners and nearby supports are checked as one connected fit system.
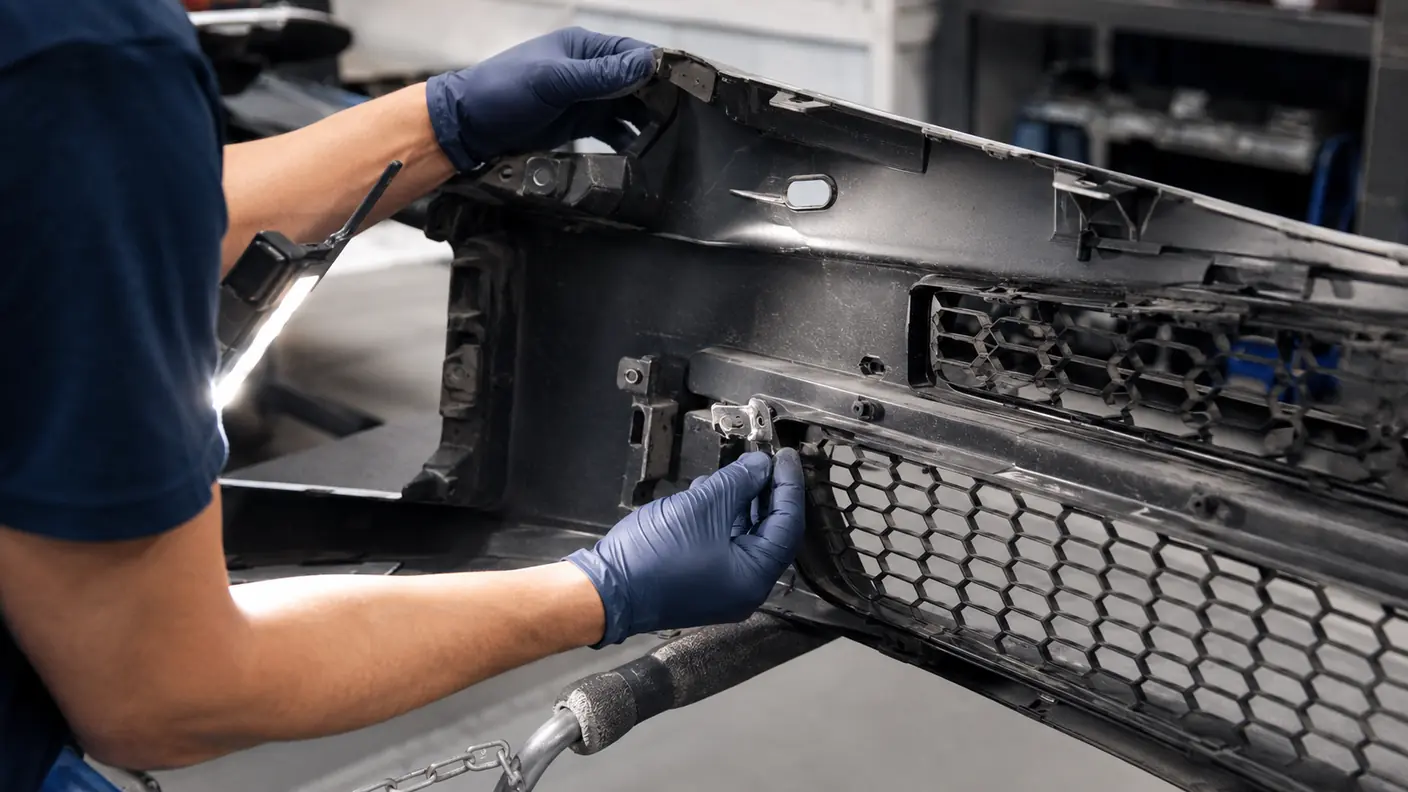
Inspect the connection: A cracked or missing tab is checked together with its mating retainer, fasteners, wheel-arch liner points and accessible supports. Repairing only one failed part can leave the same loose edge.
Choose repair or replacement: Plastic repair depends on compatible material, clean access and enough sound plastic around the damage. Missing, fragmented or highly stressed mounting areas can make replacement the more reliable route. See our guide to professional bumper-repair tools for the role of preparation and heat control.
Record what access reveals: When removal is approved, the rear of the cover is photographed before repair so any added retainer, grille or bracket item is tied to visible evidence rather than guesswork.
Repair, refinish or replace
The least disruptive suitable route is not always the smallest visible route
Surface correction
This can suit transfer or very light defects when inspection confirms adequate coating remains. It does not hide a cut through colour or exposed plastic.
- Clean and classify first.
- Use controlled correction.
- Review under direct light.
Cover repair and refinish
This can suit repairable dents, gouges, cracks or local attachment damage when the material, shape and remaining integrity support the method.
- Restore stable shape.
- Repair suitable plastic damage.
- Prepare and refinish the agreed area.
Replacement route
This may be considered where damage is extensive, material is missing, key mounting areas are compromised, previous repair is failing or the expected result cannot be supported by another repair.
- Confirm exact part identity.
- Trial fit before final paint.
- Transfer only serviceable agreed items.
A replacement bumper cover is not a finished result by itself. The part may arrive bare or primed and can require preparation, painting, transfer of grilles or trims, new one-time fasteners, trial fit and final alignment. Part source, condition and compatibility should be recorded. A repair route also needs honest boundaries. Filling over an unstable crack, heating a severely stretched area into temporary shape or gluing a failed mounting point without addressing load is not a durable plan.
Fitted openings and nearby equipment
Sensor openings are inspected without pretending bodywork alone completes every technical requirement
Many modern bumper covers include openings, bezels or brackets for parking sensors, cameras, lamps, front radar modules or other ADAS-related equipment where fitted. The presence and arrangement vary by vehicle. During body repair planning, we record visible condition, mounting security and anything that has moved with the cover.
A warning after impact matters. It should be documented and communicated before work begins. Painting over an opening, changing bracket position, mixing components between locations or leaving a loose bezel can create a separate problem. Components and their positions should be kept identifiable during dismantling and reassembly.
This page does not claim that a cosmetic bumper repair automatically diagnoses, calibrates or validates electronic systems. Requirements depend on the vehicle, the affected component, the repair procedure and any warning or impact history. If a front radar, camera or sensor mounting position has been disturbed, vehicle-specific aiming, calibration, scan or programming requirements may apply after repair. Where a separate technical check or calibration is indicated, it should be identified in the scope rather than implied by a painted cover.
The same caution applies to reinforcement and absorber components. Their condition should be considered after meaningful impact or where accessible evidence suggests involvement. We do not label them damaged merely because the outer cover is scratched, and we do not assume they are sound where the cover has absorbed a stronger hit.
Paint must follow the substrate
Front bumper paint repair starts with plastic condition, not colour alone
A bumper cover flexes differently from a metal panel. The preparation plan considers the specific plastic surface, existing coating, exposed substrate, feathered repair edges, contamination and any earlier refinishing. The repaired shape must be stable before primer and colour are used to make it look complete.
Colour identification begins with vehicle information and a physical comparison. Age, exposure, earlier paintwork, metallic orientation and the angle of the bumper can affect appearance. A painted plastic bumper may not read exactly like an adjacent metal fender under every light even from new, so the goal is a controlled, defensible match rather than a simplistic promise based only on a code.
Preparation should reach sound material. Deep gouges, poor adhesion, cracking around a flexible corner or failing previous filler need to be addressed rather than buried. Masking decisions also matter around grilles, bezels, lamps and lower trim. Where removal is justified, it can provide cleaner edges and reduce the risk of coating items that were never meant to be painted.
After curing, the finish is reviewed for colour, texture, gloss, dirt inclusions, edge quality and consistency across the visible face. The bumper is then judged back on the vehicle. A polished panel on a stand does not confirm correct corner fit, grille seating or alignment with adjoining parts.
Upper face
Reflections, colour and grille or lamp edges are highly visible from standing height.
Corner return
Curvature and flexible edges expose poor shape or heavy paint buildup.
Wheel-arch joint
Tabs, retainers, liner fasteners and the fender meeting line control fit.
Lower edge
Kerb damage, scrapes and loose air deflectors require a low-angle handover check.
Dubai planning bands
How much does front bumper repair cost in Dubai?
These bands are useful for early planning. They are not a quotation from a photograph. Material, crack position, mounting damage, finish type, dismantling, fitted trim, part source and hidden findings can change the actual scope.
Front bumper estimate tickets
Each ticket describes a different repair level. Costs should not be added together automatically because some scopes already include preparation and paint.
For a suitable surface condition after cleaning and inspection show that deeper colour or substrate damage is not present.
For suitable local cover damage requiring controlled plastic work, preparation and refinishing. Mounting damage can change this range.
A planning band for a complete cover refinish. Finish type, dismantling, previous repair and grille or trim work affect the quote.
Part cost varies widely by vehicle and specification. Preparation, paint, transfer items, fasteners and fit work must be confirmed.
Inspection and current-market caveat: lamp, grille, sensor, camera, reinforcement, absorber and adjoining-panel work are separate when affected. Replacement pricing depends on the exact verified part and current availability. For wider accident planning, see our published Dubai accident repair cost guide.
A controlled repair sequence
From intake photographs to front-corner handover
Record
Photograph the full front, damaged area, lower edge, adjoining gaps and existing marks before disturbance.
Classify
Separate transfer, coating damage, deformation, cracks, tabs, retainers, grilles and possible adjacent involvement.
Define
Explain confirmed work, authorised access, conditional findings, part checks and any separate technical requirement.
Protect
Plan removal, masking and support for lamps, trim, fitted components, wheel-arch liner and painted surfaces.
Restore
Correct suitable shape and complete agreed plastic work without hiding unstable cracks or missing material.
Refinish
Prepare sound substrate, apply the selected paint system and cure it before forcing the cover into position.
Reassemble
Refit serviceable agreed items, replace confirmed failed attachments and review grille, lamp and corner seating.
Verify
Inspect finish, secure fit, lower edge, adjoining relationships and every item disturbed by the repair.
Insurance, parts and timing
Separate workshop time from approvals and parts waiting
Insurance file: Record the vehicle details, available incident information, intake photographs, visible-damage estimate and any conditional access notes. Coverage, liability, excess and approval remain insurer and policy decisions.
Findings after access: Photograph any incident-related retainer, grille or inner damage revealed after authorised removal and submit it clearly as a supplementary item where approval is required.
Parts and timing: Verify part number, openings, finish, source and condition. Repair stages can be controlled, but insurer review, special-order parts and additional findings can extend calendar time.
A clear estimate separates
Bumper cover repair or replacement.
Surface correction or repaint scope.
Tabs, retainers and fasteners.
Grilles, bezels and lower trim.
Confirmed lamp or panel work.
Parts source and availability.
Conditional findings after access.
Separate technical checks.

The last check is a complete front view
Handover should confirm finish, fit and every disturbed item
A repaired bumper is reviewed clean and dry under direct and broad light. The painted face should show coherent colour, gloss and texture without an obvious repair boundary. Corners and styled ridges are observed from several angles because excess filler or unresolved deformation can appear only in a moving reflection.
The cover-to-fender joint, lamp surround, grille line and bonnet relationship are checked against the agreed scope. The purpose is not to force every vehicle into a universal measurement. It is to confirm that the front corner sits securely and reads coherently for that design.
Agreed grilles, bezels, lower trim, wheel-arch liner edges, fasteners and accessible attachments disturbed during work are checked. The underside matters. A front bumper can look correct from standing height while a lower deflector remains loose or a kerb scrape is unfinished.
The owner should receive a clear account of what was corrected, repaired, painted or replaced, which parts were transferred, and whether any separate recommendation remains. Paint aftercare should be explained, especially around fresh clear coat and newly fitted edges.
- Review the complete bumper under clean reflections.
- Check colour, texture, gloss and preparation edges.
- Follow the bumper-to-fender line on both sides.
- Review lamp and grille seating.
- Confirm tabs, retainers and fasteners are secure.
- Inspect the corner return and wheel-arch joint.
- Look beneath the lower edge and air deflectors.
- Confirm fitted openings and bezels are clean.
- Compare the result with intake photographs.
- Explain aftercare and any separate technical advice.
Common questions
Front bumper repair FAQs
Can a scratched front bumper be repaired without repainting?
Sometimes. Paint transfer or a light clear coat mark may respond to controlled cleaning or polishing when enough sound coating remains. A scratch through colour, exposed plastic, cracking or a deep gouge usually needs a different preparation and refinishing route.
How much does front bumper repair cost in Dubai?
Indicative planning bands are from AED 150 for suitable surface correction, AED 500 to AED 1,200 for plastic repair plus paint, AED 600 to AED 1,500 for a complete bumper repaint, and AED 1,200 to AED 6,000 or more for replacement scope. Inspection and current part pricing are required.
Can a cracked plastic bumper be welded?
It can be possible when material, crack position, contamination, missing material and surrounding integrity suit a controlled plastic repair. Damage through a highly stressed mounting area, extensive fragmentation or an unsuitable previous repair can make replacement more defensible.
Should a damaged bumper be repaired or replaced?
The decision considers material, deformation, cracks, gouges, tab condition, previous repair, fitted openings, part availability and expected finish. Many local defects remain repair candidates. Extensive damage, missing material or compromised key attachments can support replacement.
Why is my bumper corner sticking out near the fender?
A side tab, guide, retainer, fastener or cover edge may be damaged or released. The mating parts need inspection as a set. Pushing the corner inward without finding the cause may create only temporary alignment or place new stress on the cover.
Can you quote front bumper repair from photographs?
Photographs help with initial triage when they include the full front, close damage, low edge and bumper-to-fender joint. They cannot confirm material, reverse-side tabs, retainers, hidden grille connections, previous filler or every fitted component. A final method and quotation require physical inspection.
Does a bumper scuff mean the reinforcement is damaged?
No. A cosmetic scuff does not by itself prove reinforcement or absorber damage. A stronger impact, displaced cover, changed adjoining fit or evidence visible after authorised access can justify a wider inspection. Findings should be based on evidence rather than the word bumper.
What happens to parking sensors during bumper repair?
Visible condition, mounting security and position are recorded, and components disturbed by the repair should remain identifiable during reassembly. Any warning or separate technical requirement should be documented. Cosmetic bodywork alone does not automatically diagnose, calibrate or validate electronic systems.
Can a badly scraped lower bumper edge be repaired?
Often, but the decision depends on gouge depth, deformation, cracking, lost material, underside attachments and previous repair. Lower trim, air deflectors, fasteners and kerb contact should be viewed from beneath rather than judged only from standing height.
Can front bumper damage be included in an insurance claim?
We can document visible damage and prepare an estimate. Coverage, liability, excess, required reports, approval and settlement depend on the insurer and policy. Incident-related findings discovered after authorised access may require supplementary photographs and approval.
How long does front bumper repair take?
Timing depends on surface correction, plastic shaping, crack or tab repair, paint preparation, curing, trim work, replacement-part availability, trial fit, hidden findings and insurance approval. A useful schedule separates active workshop time from parts and approval waiting.
What should I check when the bumper is handed over?
Review colour, texture, gloss, contour, bumper-to-fender joints, lamp and grille seating, corner stability, lower trim, liner edges, fasteners and every fitted item disturbed by the repair. The handover should identify repaired, painted and replaced parts plus aftercare and separate recommendations.
Start with the full front corner
Arrange a front bumper repair assessment in Dubai
Send clear photographs and tell us whether the damage followed parking contact, a kerb strike or a road collision. We will inspect the cover, paint, attachments, trim and adjoining relationships, then explain the proposed route and current quotation before work begins.